VueUse Core
VueUse 是 Vue 3 生态中最受欢迎、最实用的工具库之一,基本是做 Vue3 + TypeScript 项目的“标配”。
@vueuse/core 是 Vue 生态中最常用的工具函数库之一,提供大量基于 Composition API 的 useXxx() 组合式函数,用来处理浏览器能力、异步、事件、状态管理、动画、网络、存储等常见逻辑。它能显著减少业务代码量,提升开发效率和可读性,支持 Vue2/3、TypeScript、SSR,函数设计一致性强,也易于拓展,是前端现代 Vue 项目必备的实用工具集。
基础配置
安装依赖
pnpm add @vueuse/core@14.1.0常用方法
本地存储:useLocalStorage
演示如何用 useLocalStorage 实现一个自动和 localStorage 同步的响应式数据。
特点:
- 刷新页面数据不丢失
- 修改变量自动写入 localStorage
- 不需要 watch
- 不需要手写 localStorage API
<template>
  <div class="app">
    <h1>VueUse - useLocalStorage 示例</h1>

    <div class="card">
      <label>用户名:</label>
      <input v-model="username" placeholder="请输入用户名" />
    </div>

    <div class="card">
      <label>年龄:</label>
      <input type="number" v-model.number="age" />
    </div>

    <div class="card">
      <label>是否登录:</label>
      <input type="checkbox" v-model="isLogin" />
    </div>

    <div class="card">
      <button @click="reset">清空本地存储</button>
    </div>

    <div class="preview">
      <h3>当前状态(实时同步 localStorage)</h3>
      <pre>{{ state }}</pre>
    </div>
  </div>
</template>

<script setup lang="ts">
  import { computed } from 'vue'
  import { useLocalStorage } from '@vueuse/core'

  /**
   * useLocalStorage 会自动完成:
   * 1. 从 localStorage 读取初始值
   * 2. 变更时自动写入 localStorage
   * 3. 保持 Vue 响应式
   */

// 字符串
  const username = useLocalStorage<string>('demo-username', '')

  // 数字
  const age = useLocalStorage<number>('demo-age', 18)

  // 布尔
  const isLogin = useLocalStorage<boolean>('demo-isLogin', false)

  // 用于页面展示整体状态
  const state = computed(() => ({
    username: username.value,
    age: age.value,
    isLogin: isLogin.value,
  }))

  // 清空示例数据
  function reset() {
    username.value = ''
    age.value = 18
    isLogin.value = false
  }
</script>

<style scoped>
  .app {
    padding: 24px;
    font-family: sans-serif;
  }

  h1 {
    margin-bottom: 20px;
  }

  .card {
    margin-bottom: 12px;
  }

  .card label {
    display: inline-block;
    width: 80px;
  }

  .card input {
    padding: 4px 8px;
  }

  button {
    padding: 6px 12px;
    cursor: pointer;
  }

  .preview {
    margin-top: 20px;
    background: #f6f8fa;
    padding: 12px;
    border-radius: 6px;
  }

  pre {
    margin: 0;
  }
</style>会话存储:useSessionStorage
useSessionStorage 和 useLocalStorage 的用法几乎一模一样,唯一的区别是:
数据只在当前浏览器标签页会话中有效,关闭标签页后数据自动清空。
非常适合用来存:
- 当前页面的筛选条件
- 临时表单草稿
- 多步骤表单进度
- 当前会话态登录信息
<template>
  <div class="app">
    <h1>VueUse - useSessionStorage 示例</h1>

    <p class="tip">
      提示:关闭当前浏览器标签页后重新打开,数据会消失;刷新页面数据仍然存在。
    </p>

    <div class="card">
      <label>搜索关键字:</label>
      <input v-model="keyword" placeholder="请输入搜索关键字" />
    </div>

    <div class="card">
      <label>当前页码:</label>
      <input type="number" v-model.number="page" />
    </div>

    <div class="card">
      <label>排序方式:</label>
      <select v-model="sort">
        <option value="default">默认</option>
        <option value="time">时间</option>
        <option value="hot">热度</option>
      </select>
    </div>

    <div class="card">
      <button @click="reset">清空会话数据</button>
    </div>

    <div class="preview">
      <h3>当前 Session 状态(实时同步 sessionStorage)</h3>
      <pre>{{ state }}</pre>
    </div>
  </div>
</template>

<script setup lang="ts">
  import { computed } from 'vue'
  import { useSessionStorage } from '@vueuse/core'

  /**
   * useSessionStorage 特点:
   * 1. 基于 sessionStorage
   * 2. 刷新页面数据仍然存在
   * 3. 关闭标签页后数据消失
   * 4. 与 Vue 响应式系统完全打通
   */

// 搜索关键字
  const keyword = useSessionStorage<string>('demo-keyword', '')

  // 当前页码
  const page = useSessionStorage<number>('demo-page', 1)

  // 排序方式
  const sort = useSessionStorage<string>('demo-sort', 'default')

  // 页面展示整体状态
  const state = computed(() => ({
    keyword: keyword.value,
    page: page.value,
    sort: sort.value,
  }))

  // 重置会话数据
  function reset() {
    keyword.value = ''
    page.value = 1
    sort.value = 'default'
  }
</script>

<style scoped>
  .app {
    padding: 24px;
    font-family: sans-serif;
  }

  h1 {
    margin-bottom: 12px;
  }

  .tip {
    color: #666;
    margin-bottom: 16px;
    font-size: 14px;
  }

  .card {
    margin-bottom: 12px;
  }

  .card label {
    display: inline-block;
    width: 100px;
  }

  .card input,
  .card select {
    padding: 4px 8px;
  }

  button {
    padding: 6px 12px;
    cursor: pointer;
  }

  .preview {
    margin-top: 20px;
    background: #f6f8fa;
    padding: 12px;
    border-radius: 6px;
  }

  pre {
    margin: 0;
  }
</style>防抖 / 节流:useDebounceFn、useThrottleFn
- 防抖(Debounce):停止操作一段时间后才执行 → 适合搜索框、输入联想
- 节流(Throttle):固定时间内只执行一次 → 适合按钮点击、防止重复提交、滚动监听
<template>
  <div class="app">
    <h1>VueUse - 防抖 & 节流</h1>

    <!-- 防抖示例 -->
    <div class="card">
      <h2>防抖(useDebounceFn)</h2>
      <p>停止输入 800ms 后才会触发“搜索”</p>
      <input
          v-model="keyword"
          placeholder="输入搜索内容"
          @input="onInput"
      />
      <p>搜索触发次数:{{ debounceCount }}</p>
      <p>最后一次搜索内容:{{ lastSearch }}</p>
    </div>

    <!-- 节流示例 -->
    <div class="card">
      <h2>节流(useThrottleFn)</h2>
      <p>连续点击按钮,每 1000ms 只执行一次</p>
      <button @click="onClick">疯狂点击我</button>
      <p>实际执行次数:{{ throttleCount }}</p>
      <p>最后一次执行时间:{{ lastClickTime }}</p>
    </div>
  </div>
</template>

<script setup lang="ts">
  import { ref } from 'vue'
  import { useDebounceFn, useThrottleFn } from '@vueuse/core'

  /**
   * 防抖:
   * 连续触发时只会在最后一次触发结束后执行
   */
  const keyword = ref('')
  const debounceCount = ref(0)
  const lastSearch = ref('')

  const doSearch = () => {
    debounceCount.value++
    lastSearch.value = keyword.value
  }

  const onInput = useDebounceFn(doSearch, 800)

  /**
   * 节流:
   * 在固定时间间隔内只允许执行一次
   */
  const throttleCount = ref(0)
  const lastClickTime = ref('')

  const doClick = () => {
    throttleCount.value++
    lastClickTime.value = new Date().toLocaleTimeString()
  }

  const onClick = useThrottleFn(doClick, 1000)
</script>

<style scoped>
  .app {
    padding: 24px;
    font-family: sans-serif;
  }

  .card {
    padding: 16px;
    margin-bottom: 20px;
    border: 1px solid #ddd;
    border-radius: 8px;
  }

  input {
    padding: 6px 10px;
    width: 200px;
  }

  button {
    padding: 6px 12px;
    cursor: pointer;
  }
</style>数字滚动:useTransition
数字滚动(类似大屏数字翻牌效果)
适用场景:
- 金额增长
- 统计数字动画
- 仪表盘数据变化
<template>
  <div class="counter">
    {{ Math.floor(displayValue) }}
  </div>

  <button @click="changeValue">变更数字</button>
</template>

<script setup lang="ts">
import { ref } from 'vue';
import { useTransition } from '@vueuse/core';

const source = ref(0);

const displayValue = useTransition(source, {
  duration: 1000,
  easing: [0.4, 0, 0.2, 1],
});

const changeValue = () => {
  source.value = Math.floor(Math.random() * 10000);
};
</script>

<style scoped>
.counter {
  font-size: 48px;
  font-weight: bold;
}
</style>窗口大小:useWindowSize
这个 Hook 用来实时获取浏览器窗口的宽度和高度,是做:
- 响应式布局
- 大屏系统
- 移动端 / PC 适配
- 图表自适应
最核心的能力:不用写 resize 事件监听,宽高天然就是响应式的。
<template>
  <div class="app">
    <h1>VueUse - useWindowSize</h1>

    <div class="info">
      <p>窗口宽度:{{ width }} px</p>
      <p>窗口高度:{{ height }} px</p>
    </div>

    <div class="box" :class="layoutClass">
      <span>{{ layoutText }}</span>
    </div>

    <p class="tip">
      拖动浏览器窗口大小,观察上方数值与下方区域样式变化。
    </p>
  </div>
</template>

<script setup lang="ts">
  import { computed } from 'vue'
  import { useWindowSize } from '@vueuse/core'

  /**
   * useWindowSize 会返回两个响应式 Ref:
   * - width:窗口宽度
   * - height:窗口高度
   */
  const { width, height } = useWindowSize()

  /**
   * 根据窗口宽度动态切换布局状态
   */
  const layoutClass = computed(() => {
    if (width.value < 600) {
      return 'mobile'
    }
    if (width.value < 1024) {
      return 'tablet'
    }
    return 'desktop'
  })

  const layoutText = computed(() => {
    if (width.value < 600) {
      return '当前为:移动端布局'
    }
    if (width.value < 1024) {
      return '当前为:平板布局'
    }
    return '当前为:桌面端布局'
  })
</script>

<style scoped>
  .app {
    padding: 24px;
    font-family: sans-serif;
  }

  .info {
    background: #f6f8fa;
    padding: 12px;
    border-radius: 6px;
    margin-bottom: 16px;
  }

  .box {
    height: 120px;
    display: flex;
    align-items: center;
    justify-content: center;
    border-radius: 8px;
    font-size: 18px;
    color: white;
  }

  /* 移动端 */
  .mobile {
    background: #42b883;
  }

  /* 平板 */
  .tablet {
    background: #409eff;
  }

  /* 桌面端 */
  .desktop {
    background: #67c23a;
  }

  .tip {
    margin-top: 16px;
    color: #666;
  }
</style>滚动监听:useScroll
useScroll 用来实时获取滚动容器的滚动位置,非常适合:
- 列表滚动加载
- 返回顶部按钮
- 滚动进度条
- 大屏滚动联动效果
下面是一个完整可运行的 App.vue 示例:
- 左侧是可滚动容器
- 右侧实时显示
x / y滚动距离 - 滚动超过 200px 给出状态提示
<template>
  <div class="app">
    <h1>VueUse - useScroll</h1>

    <div class="container">
      <!-- 可滚动区域 -->
      <div ref="scrollRef" class="scroll-box">
        <div
            v-for="n in 50"
            :key="n"
            class="item"
        >
          列表项 {{ n }}
        </div>
      </div>

      <!-- 状态面板 -->
      <div class="panel">
        <p>横向滚动 x:{{ x }} px</p>
        <p>纵向滚动 y:{{ y }} px</p>
        <p>是否滚动超过 200px:{{ isOver200 ? '是' : '否' }}</p>
      </div>
    </div>

    <!-- 返回顶部按钮 -->
    <button
        v-if="isOver200"
        class="back-top"
        @click="scrollToTop"
    >
      ↑ 返回顶部
    </button>
  </div>
</template>

<script setup lang="ts">
  import { ref, computed } from 'vue'
  import { useScroll } from '@vueuse/core'

  /**
   * 1. 定义一个滚动容器 ref
   */
  const scrollRef = ref<HTMLElement | null>(null)

  /**
   * 2. useScroll 监听该容器的滚动
   *    x、y 都是响应式 Ref
   */
  const { x, y } = useScroll(scrollRef)

  /**
   * 3. 根据滚动距离派生业务状态
   */
  const isOver200 = computed(() => y.value > 200)

  /**
   * 4. 返回顶部
   */
  const scrollToTop = () => {
    scrollRef.value?.scrollTo({
      top: 0,
      behavior: "smooth",
    })
  }
</script>

<style scoped>
  .app {
    padding: 24px;
    font-family: sans-serif;
  }

  .container {
    display: flex;
    gap: 20px;
  }

  /* 可滚动区域 */
  .scroll-box {
    width: 300px;
    height: 400px;
    border: 1px solid #ddd;
    overflow-y: auto;
    padding: 8px;
    box-sizing: border-box;
  }

  /* 列表项 */
  .item {
    height: 40px;
    line-height: 40px;
    border-bottom: 1px solid #eee;
    padding-left: 8px;
  }

  /* 状态面板 */
  .panel {
    flex: 1;
    background: #f6f8fa;
    padding: 12px;
    border-radius: 6px;
  }

  /* 返回顶部 */
  .back-top {
    position: fixed;
    right: 40px;
    bottom: 40px;
    padding: 8px 14px;
    border: none;
    border-radius: 4px;
    background: #409eff;
    color: white;
    cursor: pointer;
  }
</style>剪贴板:useClipboard
useClipboard 用于与系统剪贴板交互,最常见场景:
- 一键复制文本
- 复制链接
- 复制代码片段
- 显示复制成功状态
<template>
  <div class="app">
    <h1>VueUse - useClipboard</h1>

    <div class="card">
      <label>待复制内容:</label>
      <textarea
          v-model="text"
          placeholder="请输入要复制的内容"
      ></textarea>
    </div>

    <div class="card">
      <button @click="copyText">复制到剪贴板</button>
      <span
          v-if="copied"
          class="success"
      >
        复制成功!
      </span>
    </div>

    <div class="preview">
      <h3>当前剪贴板内容(只读)</h3>
      <pre>{{ clipboardText }}</pre>
    </div>
  </div>
</template>

<script setup lang="ts">
  import { ref } from 'vue'
  import { useClipboard } from '@vueuse/core'

  /**
   * useClipboard 提供:
   * - copy:写入剪贴板
   * - copied:复制成功的响应式状态
   * - text:当前剪贴板文本内容(只读)
   */
  const { copy, copied, text: clipboardText } = useClipboard()

  const text = ref('Hello VueUse! 这是一个剪贴板示例')

  /**
   * 复制文本到剪贴板
   */
  function copyText() {
    copy(text.value)
  }
</script>

<style scoped>
  .app {
    padding: 24px;
    font-family: sans-serif;
  }

  .card {
    margin-bottom: 16px;
  }

  label {
    display: block;
    margin-bottom: 6px;
  }

  textarea {
    width: 100%;
    height: 80px;
    padding: 6px;
    box-sizing: border-box;
  }

  button {
    padding: 6px 12px;
    cursor: pointer;
  }

  .success {
    margin-left: 12px;
    color: #67c23a;
    font-weight: bold;
  }

  .preview {
    margin-top: 20px;
    background: #f6f8fa;
    padding: 12px;
    border-radius: 6px;
  }

  pre {
    margin: 0;
  }
</style>暗黑模式:useDark、useToggle
useDark 专门用来做暗黑模式状态管理, useToggle 用来优雅地切换布尔值状态。 两个组合起来,几乎是 Vue3 项目暗黑模式的标准写法。
特点:
- 自动监听系统主题
- 自动给
html添加class="dark" - 状态响应式
- 刷新页面仍然生效(默认走 localStorage)
<template>
  <div class="app" :class="{ dark: isDark }">
    <h1>VueUse - 暗黑模式</h1>

    <div class="card">
      <p>当前模式:{{ isDark ? '暗黑模式' : '明亮模式' }}</p>
      <button @click="toggle">
        切换模式
      </button>
    </div>

    <div class="box">
      这是一个根据暗黑模式自动变色的区域
    </div>
  </div>
</template>

<script setup lang="ts">
  import { useDark, useToggle } from '@vueuse/core'

  /**
   * useDark:
   * - 返回一个 Ref<boolean>
   * - true = 暗黑模式
   * - false = 明亮模式
   * - 默认使用 localStorage 持久化
   * - 默认在 html 上加 dark class
   */
  const isDark = useDark()

  /**
   * useToggle:
   * - 专门用来切换 boolean
   */
  const toggleDark = useToggle(isDark)

  const toggle = () => toggleDark()
</script>

<style scoped>
  .app {
    padding: 24px;
    min-height: 100vh;
    background: #ffffff;
    color: #333;
    transition: all 0.3s;
  }

  /* 暗黑模式 */
  .app.dark {
    background: #121212;
    color: #e5e5e5;
  }

  .card {
    margin-bottom: 16px;
  }

  button {
    padding: 6px 12px;
    cursor: pointer;
  }

  .box {
    padding: 20px;
    border-radius: 8px;
    background: #f0f0f0;
    transition: all 0.3s;
  }

  /* 暗黑下的盒子 */
  .app.dark .box {
    background: #1e1e1e;
  }
</style>网络状态:useNetwork
useNetwork 用来获取当前设备的网络状态信息,常用于:
- 判断是否在线/离线
- 弱网提示
- 离线模式处理
- 大文件上传前的网络检测
注意:部分字段在不同浏览器中支持程度不同,但 isOnline 基本都可用。
<template>
  <div class="app">
    <h1>VueUse - useNetwork</h1>

    <div class="status" :class="{ offline: !isOnline }">
      当前网络状态:
      <strong>{{ isOnline ? '在线' : '离线' }}</strong>
    </div>

    <div class="card">
      <p>网络类型:{{ type || '未知' }}</p>
      <p>有效网络类型:{{ effectiveType || '未知' }}</p>
      <p>下行速度:{{ downlink ? downlink + ' Mb/s' : '未知' }}</p>
      <p>往返延迟 RTT:{{ rtt ? rtt + ' ms' : '未知' }}</p>
      <p>是否开启省流量模式:{{ saveData ? '是' : '否' }}</p>
    </div>

    <div class="tip">
      <p>提示:</p>
      <ul>
        <li>断开网络或切换网络类型,以上数据会实时变化</li>
        <li>某些字段在 Safari 或旧版浏览器中可能为 undefined</li>
      </ul>
    </div>
  </div>
</template>

<script setup lang="ts">
  import { useNetwork } from '@vueuse/core'

  /**
   * useNetwork 返回一个响应式对象,包含:
   * - isOnline:是否在线
   * - type:网络类型(wifi / cellular 等)
   * - effectiveType:网络质量(4g / 3g / slow-2g)
   * - downlink:下行速度(Mb/s)
   * - rtt:往返延迟(ms)
   * - saveData:是否开启省流量模式
   */
  const {
    isOnline,
    type,
    effectiveType,
    downlink,
    rtt,
    saveData,
  } = useNetwork()
</script>

<style scoped>
  .app {
    padding: 24px;
    font-family: sans-serif;
  }

  .status {
    padding: 12px;
    border-radius: 6px;
    margin-bottom: 16px;
    background: #f0f9eb;
    color: #67c23a;
    font-size: 18px;
  }

  /* 离线状态 */
  .status.offline {
    background: #fef0f0;
    color: #f56c6c;
  }

  .card {
    background: #f6f8fa;
    padding: 16px;
    border-radius: 6px;
    line-height: 1.8;
  }

  .tip {
    margin-top: 16px;
    color: #666;
    font-size: 14px;
  }
</style>鼠标位置:useMouse
useMouse 用来实时获取鼠标在页面中的坐标位置,是做:
- 交互特效
- 悬浮提示
- 跟随动画
- 数据大屏鼠标联动
最直观的效果: 页面上有一个小圆点,始终跟着你的鼠标移动,同时实时显示坐标值。
<template>
  <div class="app">
    <h1>VueUse - useMouse</h1>

    <div class="info">
      <p><b>page</b>   X: {{ pageX }}   Y: {{ pageY }}</p>
      <p><b>client</b> X: {{ clientX }} Y: {{ clientY }}</p>
      <p><b>screen</b> X: {{ screenX }} Y: {{ screenY }}</p>
      <p><b>movement</b> X: {{ movX }}   Y: {{ movY }}</p>
    </div>

    <!-- 用 client 坐标跟随鼠标 -->
    <div
        class="cursor"
        :style="{
        left: clientX + 'px',
        top: clientY + 'px'
      }"
    ></div>

    <p class="tip">
      滚动页面、移动鼠标、切换窗口观察不同模式的差异。
    </p>
  </div>
</template>

<script setup lang="ts">
  import { useMouse } from '@vueuse/core'

  // page 相对于页面(受滚动影响)
  const { x: pageX, y: pageY } = useMouse({ type: 'page' })

  // client 相对于视口(不受滚动影响)
  const { x: clientX, y: clientY } = useMouse({ type: 'client' })

  // screen 相对于物理屏幕
  const { x: screenX, y: screenY } = useMouse({ type: 'screen' })

  // movement 相对上次事件的偏移量
  const { x: movX, y: movY } = useMouse({ type: 'movement' })
</script>

<style scoped>
  .app {
    padding: 24px;
    min-height: 200vh; /* 增加页面高度方便滚动 */
    font-family: sans-serif;
    position: relative;
  }

  .info {
    background: #f6f8fa;
    padding: 12px;
    border-radius: 6px;
    width: 280px;
    line-height: 1.6;
    margin-bottom: 20px;
  }

  /* 跟随鼠标的小圆点 */
  .cursor {
    position: fixed;
    width: 14px;
    height: 14px;
    background: #409eff;
    border-radius: 50%;
    transform: translate(-50%, -50%);
    pointer-events: none;
    z-index: 9999;
  }

  .tip {
    margin-top: 16px;
    color: #666;
  }
</style>Base64:useBase64
文本 Base64:useBase64(字符串编码)
useBase64 可以将响应式字符串实时转换为 Base64,适用于:
- 数据加密展示
- API 调试
- 剪贴板操作
- 实时编码预览
<template>
  <div class="app">
    <h1>VueUse - useBase64(文本)</h1>

    <input v-model="text" placeholder="输入文本" />

    <div class="result">
      <p><b>原文:</b> {{ text }}</p>
      <p><b>Base64:</b> {{ base64 }}</p>
    </div>
  </div>
</template>

<script setup lang="ts">
import { ref } from 'vue'
import { useBase64 } from '@vueuse/core'

// 响应式文本
const text = ref('Hello VueUse!')

// 将文本转换为 Base64
const { base64 } = useBase64(text)
</script>

<style scoped>
.app {
  padding: 24px;
  font-family: sans-serif;
}
input {
  width: 300px;
  padding: 6px 12px;
  margin-bottom: 12px;
}
.result p {
  margin: 4px 0;
}
</style>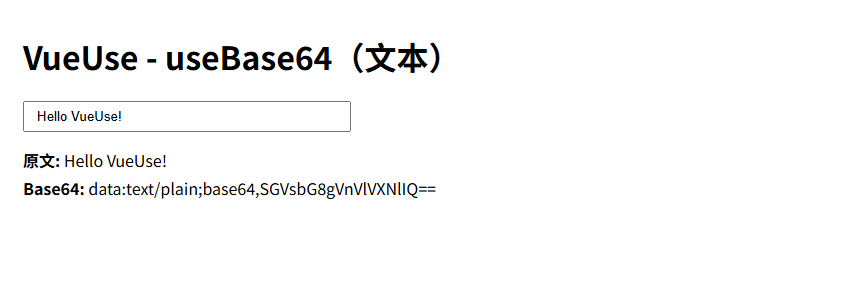
文件 Base64:useBase64(File/Blob 编码)
可以将用户上传的文件转换成 Base64,常用于:
- 文件预览
- 上传前编码
- 图片剪贴板操作
<template>
  <div class="app">
    <h1>VueUse - useBase64(文件)</h1>

    <input type="file" @change="onFileChange" />
    <div class="result" v-if="base64">
      <p><b>文件 Base64:</b></p>
      <textarea :value="base64" rows="40" readonly></textarea>
    </div>
  </div>
</template>

<script setup lang="ts">
import { ref } from 'vue'
import { useBase64 } from '@vueuse/core'

// 这里用 Ref<File>,初始化为空对象,但保证 TS 不报错
const file = ref<File>({} as File)
const { base64, execute } = useBase64(file)

// 用户选择文件
const onFileChange = async (e: Event) => {
  const input = e.target as HTMLInputElement
  const selectedFile = input.files?.[0]
  if (!selectedFile) return

  // 更新 Ref
  file.value = selectedFile
  await execute()
}
</script>

<style scoped>
.app {
  padding: 24px;
  font-family: sans-serif;
}
textarea {
  width: 100%;
  padding: 6px;
  font-size: 12px;
}
</style>
图片预览 Base64:useBase64(Image 元素)
可以将 <img> 或 <canvas> 元素转 Base64,用于:
- 图片上传前预览
- 图像处理
- 保存到 localStorage
<template>
  <div class="app">
    <h1>VueUse - useBase64(图片)</h1>

    <input type="file" accept="image/*" @change="onImageChange" />
    <img v-if="imgSrc" ref="imgEl" :src="imgSrc" alt="preview" class="preview" />

    <div class="result" v-if="base64">
      <p><b>图片 Base64:</b></p>
      <textarea :value="base64" rows="40" readonly></textarea>
    </div>
  </div>
</template>

<script setup lang="ts">
import { nextTick, ref } from 'vue'
import { useBase64 } from '@vueuse/core'

// 初始化为 {} as HTMLImageElement 保证 TS 不报错
const imgEl = ref<HTMLImageElement>({} as HTMLImageElement)
const { base64, execute } = useBase64(imgEl)

// 图片 src
const imgSrc = ref('')

// 图片选择事件
const onImageChange = async (e: Event) => {
  const input = e.target as HTMLInputElement
  const file = input.files?.[0]
  if (!file) return

  imgSrc.value = URL.createObjectURL(file)

  // 等待 img 渲染完成再执行 Base64
  await nextTick()
  // imgEl.value 已绑定到 template 中的 ref
  await execute()
}
</script>

<style scoped>
.app {
  padding: 24px;
  font-family: sans-serif;
}
.preview {
  display: block;
  max-width: 200px;
  margin: 12px 0;
}
textarea {
  width: 100%;
  padding: 6px;
  font-size: 12px;
}
</style>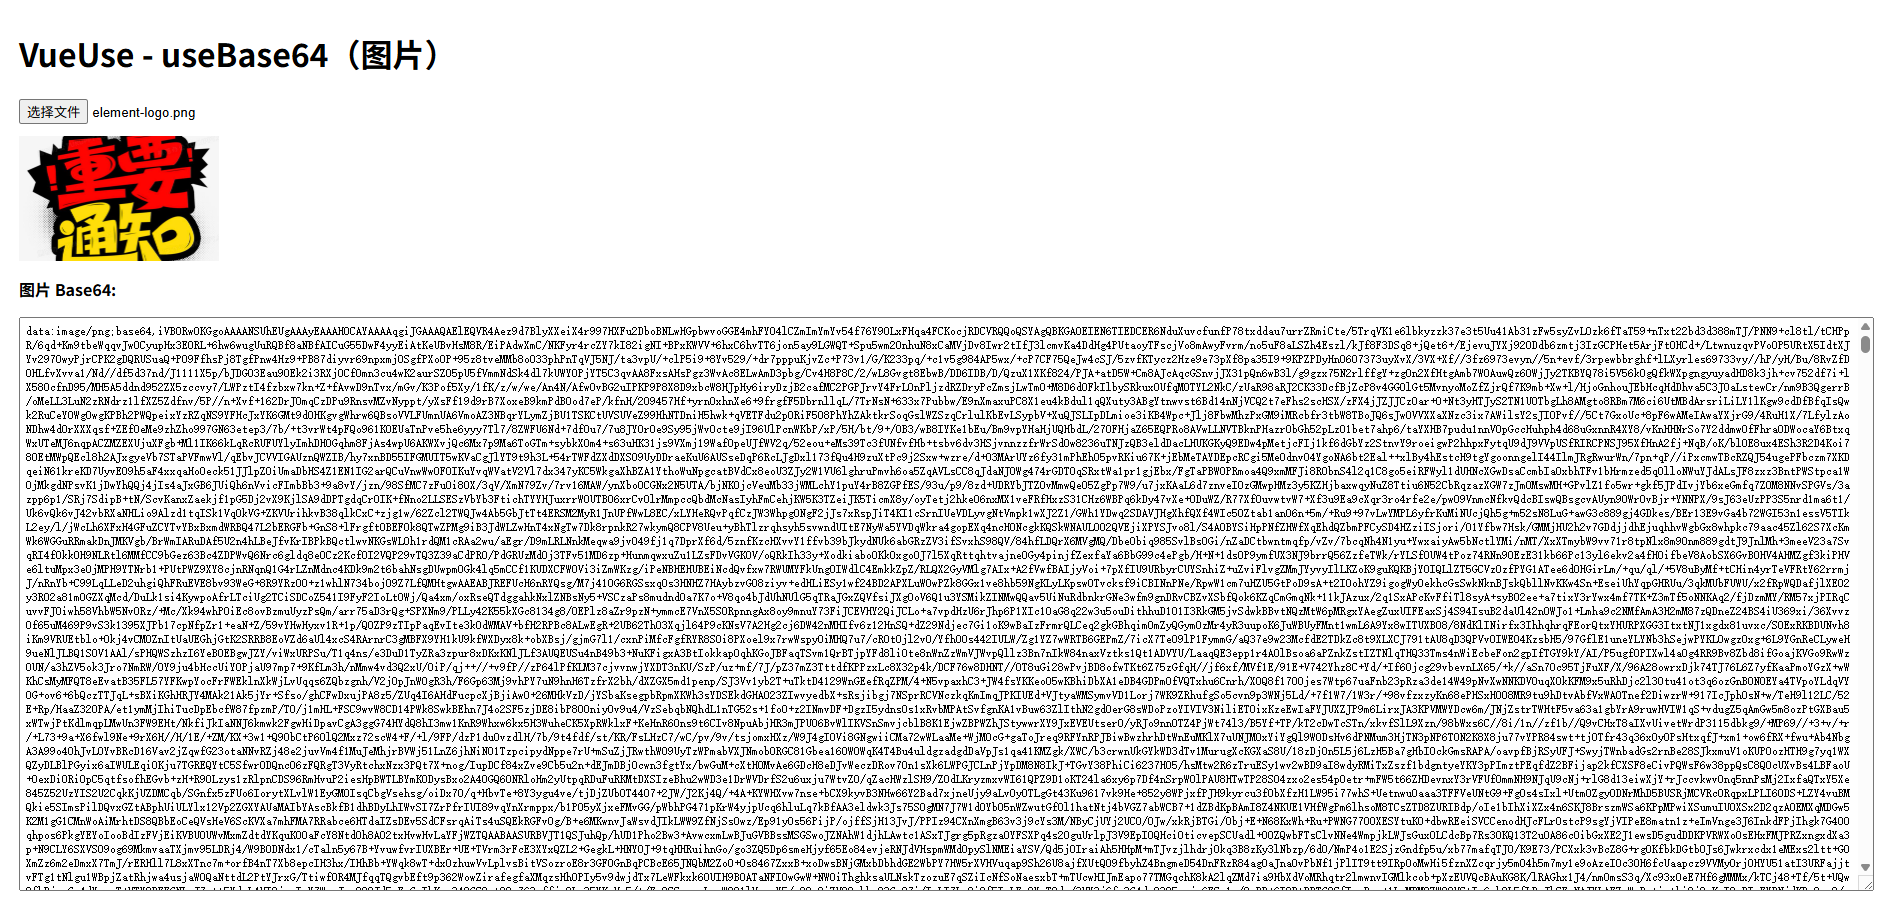
请求封装:useFetch
useFetch 是 VueUse 中非常“工程化”的一个 Hook,用来做:
- HTTP 请求
- loading / error 状态管理
- GET / POST 请求
- 响应式数据绑定
- 请求链式配置
这里用一个完整页面演示三个点:
- GET 请求获取数据
- POST 请求提交数据
- 显示 loading、error、result
<template>
  <div class="app">
    <h1>VueUse - useFetch</h1>

    <!-- GET 示例 -->
    <div class="card">
      <h2>GET 请求</h2>
      <button @click="loadGet">发送 GET 请求</button>

      <p v-if="getLoading">请求中...</p>
      <p v-if="getError" class="error">请求失败:{{ getError }}</p>

      <pre v-if="getData">{{ getData }}</pre>
    </div>

    <!-- POST 示例 -->
    <div class="card">
      <h2>POST 请求</h2>

      <div class="form">
        <input v-model="postTitle" placeholder="标题" />
        <input v-model="postBody" placeholder="内容" />
      </div>

      <button @click="loadPost">发送 POST 请求</button>

      <p v-if="postLoading">请求中...</p>
      <p v-if="postError" class="error">请求失败:{{ postError }}</p>

      <pre v-if="postData">{{ postData }}</pre>
    </div>
  </div>
</template>

<script setup lang="ts">
  import { ref } from 'vue'
  import { useFetch } from '@vueuse/core'

  /**
   * 这里使用公开测试接口:https://jsonplaceholder.typicode.com
   * 只用于演示,不依赖任何框架和额外库
   */

  /* ---------------- GET 请求 ---------------- */

  const {
    data: getData,
    error: getError,
    isFetching: getLoading,
    execute: executeGet,
  } = useFetch('https://jsonplaceholder.typicode.com/posts/1', {
    immediate: false,
  }).get().json()

  function loadGet() {
    executeGet()
  }

  /* ---------------- POST 请求 ---------------- */

  const postTitle = ref('')
  const postBody = ref('')

  const {
    data: postData,
    error: postError,
    isFetching: postLoading,
    execute: executePost,
  } = useFetch('https://jsonplaceholder.typicode.com/posts', {
    immediate: false,
  })
      .post({
        title: postTitle.value,
        body: postBody.value,
        userId: 1,
      })
      .json()

  function loadPost() {
    executePost()
  }
</script>

<style scoped>
  .app {
    padding: 24px;
    font-family: sans-serif;
  }

  .card {
    padding: 16px;
    margin-bottom: 24px;
    border: 1px solid #ddd;
    border-radius: 8px;
  }

  .form {
    display: flex;
    gap: 8px;
    margin-bottom: 12px;
  }

  input {
    padding: 6px 10px;
    flex: 1;
  }

  button {
    padding: 6px 12px;
    cursor: pointer;
  }

  .error {
    color: #f56c6c;
    font-weight: bold;
  }

  pre {
    background: #f6f8fa;
    padding: 12px;
    border-radius: 6px;
    overflow: auto;
  }
</style>WebSocket 响应式通信:useWebSocket
useWebSocket 是 VueUse 对原生 WebSocket 的工程级封装,把:
- 连接状态
- 收发消息
- 自动重连
- 心跳检测
- 错误处理
全部变成响应式数据和可控 API。
你不用再写一大堆:
const ws = new WebSocket(url)
ws.onopen = ...
ws.onmessage = ...
ws.onclose = ...而是直接用:
const { status, data, send, open, close } = useWebSocket(url)在真实项目中典型场景:
- 即时聊天
- 实时日志 / 监控
- 股票 / 行情推送
- AI 流式输出
- 后台系统实时通知
下面这个示例用的是 公开 WebSocket 测试服务: wss://ws.postman-echo.com/raw (它会把你发的消息原样返回,非常适合做 Demo)
最简版
<script setup lang="ts">
  import { ref } from 'vue'
  import { useWebSocket } from '@vueuse/core'

  const WS_URL = 'wss://ws.postman-echo.com/raw'

  const message = ref('')
  const messages = ref<string[]>([])

  const {
    status,
    send,
    open,
    close,
  } = useWebSocket(WS_URL, {
    autoReconnect: {
      retries: 3,
      delay: 2000,
    },
    heartbeat: {
      message: 'ping',
      interval: 10000,
    },
    onMessage(_, event) {
      handleServerMessage(event.data)
    },
  })

  /**
   * 单独处理服务端消息的业务函数
   *
   * @param msg 服务端的消息
   */
  function handleServerMessage(msg: string) {
    messages.value.push(`服务端:${msg}`)
  }

  /**
   * 发送消息
   */
  const sendMessage = () => {
    if (!message.value) return
    send(message.value)
    messages.value.push(`我:${message.value}`)
    message.value = ''
  }

  /**
   * 主动断开
   */
  const handleDisconnect = () => {
    close(1000, 'manual close')
  }
</script>

<template>
  <div class="container">
    <h1>useWebSocket(WebSocket 响应式通信)</h1>

    <div class="card">
      <h2>连接状态</h2>
      <p>
        当前状态:
        <span :class="{ open: status === 'OPEN', close: status !== 'OPEN' }">
          {{ status }}
        </span>
      </p>
      <button @click="open">手动连接</button>
      <button @click="handleDisconnect">断开连接</button>
    </div>

    <div class="card">
      <h2>发送消息</h2>
      <input
          v-model="message"
          placeholder="输入要发送的内容"
          class="input"
          @keyup.enter="sendMessage"
      />
      <button @click="sendMessage">发送</button>
    </div>

    <div class="card">
      <h2>消息记录</h2>
      <div class="log">
        <div v-for="(item, index) in messages" :key="index" class="log-item">
          {{ item }}
        </div>
      </div>
    </div>
  </div>
</template>

<style scoped>
  .container {
    padding: 24px;
    font-family: Arial, Helvetica, sans-serif;
  }

  .card {
    border: 1px solid #dcdcdc;
    border-radius: 6px;
    padding: 16px;
    margin-bottom: 16px;
  }

  .open {
    color: #67c23a;
    font-weight: bold;
  }

  .close {
    color: #f56c6c;
    font-weight: bold;
  }

  .input {
    width: 70%;
    padding: 6px 10px;
    border: 1px solid #dcdcdc;
    border-radius: 4px;
    margin-right: 8px;
  }

  button {
    padding: 6px 14px;
    border: none;
    border-radius: 4px;
    background-color: #409eff;
    color: #ffffff;
    cursor: pointer;
  }

  button:hover {
    opacity: 0.9;
  }

  .log {
    max-height: 200px;
    overflow-y: auto;
    background-color: #f8f8f8;
    padding: 10px;
    border-radius: 4px;
  }

  .log-item {
    font-size: 14px;
    margin-bottom: 4px;
  }

  .tip {
    background-color: #f8f8f8;
  }
</style>详细版
<script setup lang="ts">
  import { ref, computed } from 'vue'
  import { useWebSocket } from '@vueuse/core'

  const WS_URL = 'wss://ws.postman-echo.com/raw'

  const message = ref('')
  const logs = ref<string[]>([])

  const {
    status,
    send,
    open,
    close,
  } = useWebSocket(WS_URL, {
    // 初始化自动连接(默认 true)
    immediate: true,

    // 指定 WebSocket 子协议(常用于 JWT 或消息订阅协议)
    // protocols: ['token-xxxx', 'v1'],
    protocols: [],

    // 断线自动重连策略
    autoReconnect: {
      retries: 5,       // 最大重连次数
      delay: 2000,      // 固定延迟
      // 以下可实现指数退避策略:
      // delay: retryCount => Math.min(2000 * retryCount, 10000),
      onFailed() {
        appendLog('重连失败:已超过最大次数')
      },
    },

    // 心跳机制(Ping-Pong)
    heartbeat: {
      message: 'ping',
      interval: 8000,
    },

    // 打开连接回调
    onConnected(_) {
      appendLog('WebSocket 连接成功!')
    },

    // 关闭连接回调
    onDisconnected(_, event) {
      appendLog(`连接断开:code=${event.code} reason=${event.reason}`)
    },

    // 错误回调
    onError(_, event) {
      appendLog(`WebSocket 错误:${event}`)
    },

    // 收到消息
    onMessage(_, event) {
      handleServerMessage(event.data)
    },
  })

  /** 处理服务端消息 */
  function handleServerMessage(msg: string) {
    if (msg === 'pong') {
      appendLog('收到心跳响应:pong')
      return
    }
    appendLog(`服务端:${msg}`)
  }

  /** 追加日志 */
  function appendLog(text: string) {
    const time = new Date().toLocaleTimeString()
    logs.value.push(`[${time}] ${text}`)
    // 自动滚动到底部(可选)
    requestAnimationFrame(() => {
      const el = document.querySelector('.log')
      el && (el.scrollTop = el.scrollHeight)
    })
  }

  /** 手动发送 */
  const sendMessage = () => {
    if (!message.value) return
    send(message.value)
    appendLog(`我:${message.value}`)
    message.value = ''
  }

  /** 手动断开 */
  const handleDisconnect = () => {
    close(1000, 'manual close')
  }

  /** 连接状态友好提示 */
  const statusText = computed(() => {
    switch (status.value) {
      case 'OPEN': return '🟢 已连接'
      case 'CONNECTING': return '🟡 连接中...'
      case 'CLOSED': return '🔴 已关闭'
      default: return status.value
    }
  })
</script>

<template>
  <div class="container">
    <h1>useWebSocket(高级配置版)</h1>

    <div class="card">
      <h2>连接状态</h2>
      <p>{{ statusText }}</p>
      <button @click="open">手动连接</button>
      <button @click="handleDisconnect">断开连接</button>
    </div>

    <div class="card">
      <h2>发送消息</h2>
      <input v-model="message" placeholder="输入内容 回车发送" @keyup.enter="sendMessage" class="input" />
      <button @click="sendMessage">发送</button>
    </div>

    <div class="card">
      <h2>消息日志</h2>
      <div class="log">
        <div v-for="(item, index) in logs" :key="index" class="log-item">
          {{ item }}
        </div>
      </div>
    </div>
  </div>
</template>

<style scoped>
  .container {
    padding: 24px;
    font-family: Arial, Helvetica, sans-serif;
  }
  .card {
    border: 1px solid #dcdcdc;
    border-radius: 6px;
    padding: 16px;
    margin-bottom: 16px;
  }
  .input {
    width: 70%;
    padding: 6px 10px;
    border: 1px solid #dcdcdc;
    margin-right: 8px;
  }
  button {
    padding: 6px 14px;
    border: none;
    border-radius: 4px;
    background-color: #409eff;
    color: #fff;
    cursor: pointer;
  }
  button:hover {
    opacity: 0.9;
  }
  .log {
    height: 220px;
    overflow-y: auto;
    background-color: #f6f6f6;
    padding: 8px;
  }
  .log-item {
    font-size: 13px;
    margin-bottom: 4px;
    font-family: monospace;
  }
</style>携带认证
✔ 1. URL Query 携带 Token
useWebSocket(`wss://xxx.com/ws?token=${token}`)✔ 2. 子协议携带 Token
useWebSocket('wss://xxx.com/ws', {
  protocols: [`Bearer`, token]
})✔ 3. 首包认证
onConnected() {
  send(JSON.stringify({ type: 'AUTH', token }))
}浏览器相关(非常常用)
useEventListener(DOM 事件监听封装)
用于替代原生的:
window.addEventListener(...)
window.removeEventListener(...)它的优势是:
- 自动在组件卸载时移除监听
- 支持 window / document / DOM / ref
- 与 Vue3 响应式系统天然结合
- 写法简洁,工程中极高频使用
常见场景:
- 监听鼠标、键盘事件
- 监听窗口 resize、scroll
- 监听自定义 DOM 行为
- 组件级事件管理
下面才是完整示例(App.vue 可直接运行):
<script setup lang="ts">
  import { ref } from 'vue'
  import { useEventListener } from '@vueuse/core'

  const x = ref(0)
  const y = ref(0)
  const clickCount = ref(0)

  useEventListener(window, 'mousemove', (event: MouseEvent) => {
    x.value = event.clientX
    y.value = event.clientY
  })

  useEventListener(window, 'click', () => {
    clickCount.value++
  })
</script>

<template>
  <div class="container">
    <h1>useEventListener(DOM 事件监听封装)</h1>

    <div class="card">
      <h2>鼠标实时坐标</h2>
      <p>X:{{ x }}</p>
      <p>Y:{{ y }}</p>
    </div>

    <div class="card">
      <h2>全局点击次数</h2>
      <p>{{ clickCount }}</p>
      <button @click="clickCount = 0">重置计数</button>
    </div>
  </div>
</template>

<style scoped>
  .container {
    padding: 24px;
    font-family: Arial, Helvetica, sans-serif;
  }
  .card {
    border: 1px solid #dcdcdc;
    border-radius: 6px;
    padding: 16px;
    margin-bottom: 16px;
  }
  button {
    padding: 6px 14px;
    border: none;
    border-radius: 4px;
    background-color: #409eff;
    color: #ffffff;
    cursor: pointer;
  }
</style>useBreakpoints(响应式断点系统)
useBreakpoints 用来构建工程级的响应式断点体系,比单纯监听 window.innerWidth 更优雅、更语义化。 它的核心价值是:把屏幕尺寸判断从“数值比较”升级为“业务语义判断”。
你以后不会再写:
if (window.innerWidth < 768) { ... }而是写:
if (isMobile.value) { ... }这在真实项目里可读性和可维护性会高很多。
常见应用场景:
- 移动端 / PC 端布局切换
- 是否显示侧边栏
- 响应式组件尺寸
- 适配大屏、平板、手机
- UI 行为差异化处理
下面是完整示例(直接放到 App.vue 可运行):
<script setup lang="ts">
  import { computed } from 'vue'
  import { useBreakpoints } from '@vueuse/core'

  /**
   * 定义断点规则(可以完全按你的项目设计稿来)
   */
  const breakpoints = useBreakpoints({
    mobile: 0,       // 0px 以上
    tablet: 768,     // 768px 以上
    laptop: 1024,    // 1024px 以上
    desktop: 1280,   // 1280px 以上
  })

  /**
   * 语义化断点状态
   */
  const isMobile = breakpoints.smaller('tablet')
  const isTablet = breakpoints.between('tablet', 'laptop')
  const isLaptop = breakpoints.between('laptop', 'desktop')
  const isDesktop = breakpoints.greater('desktop')

  /**
   * 当前设备类型描述
   */
  const deviceType = computed(() => {
    if (isMobile.value) return '手机'
    if (isTablet.value) return '平板'
    if (isLaptop.value) return '笔记本'
    if (isDesktop.value) return '桌面大屏'
    return '未知'
  })
</script>

<template>
  <div class="container">
    <h1>useBreakpoints(响应式断点系统)</h1>

    <div class="card">
      <h2>当前设备类型</h2>
      <p class="device">{{ deviceType }}</p>
    </div>

    <div class="card">
      <h2>断点状态</h2>
      <ul>
        <li>isMobile:{{ isMobile }}</li>
        <li>isTablet:{{ isTablet }}</li>
        <li>isLaptop:{{ isLaptop }}</li>
        <li>isDesktop:{{ isDesktop }}</li>
      </ul>
    </div>

    <div class="card layout">
      <h2>模拟响应式布局</h2>
      <div
          class="box"
          :class="{
          mobile: isMobile,
          tablet: isTablet,
          laptop: isLaptop,
          desktop: isDesktop
        }"
      >
        {{ deviceType }} 布局
      </div>
    </div>

    <div class="card tip">
      <h2>说明</h2>
      <ul>
        <li>useBreakpoints 把尺寸判断转成语义判断</li>
        <li>所有断点都是响应式的,窗口变化自动更新</li>
        <li>非常适合用来做布局、菜单、组件尺寸适配</li>
        <li>建议在真实项目中统一一份断点配置</li>
      </ul>
    </div>
  </div>
</template>

<style scoped>
  .container {
    padding: 24px;
    font-family: Arial, Helvetica, sans-serif;
  }

  h1 {
    margin-bottom: 20px;
  }

  .card {
    border: 1px solid #dcdcdc;
    border-radius: 6px;
    padding: 16px;
    margin-bottom: 16px;
  }

  .card h2 {
    margin: 0 0 12px 0;
    font-size: 16px;
  }

  .device {
    font-size: 22px;
    font-weight: bold;
    color: #409eff;
  }

  .layout .box {
    padding: 24px;
    border-radius: 6px;
    text-align: center;
    font-size: 18px;
    font-weight: bold;
    color: #fff;
  }

  .box.mobile {
    background-color: #67c23a;
  }

  .box.tablet {
    background-color: #e6a23c;
  }

  .box.laptop {
    background-color: #409eff;
  }

  .box.desktop {
    background-color: #f56c6c;
  }

  .tip {
    background-color: #f8f8f8;
  }
</style>useBrowserLocation(URL / Hash / Query 响应式)
useBrowserLocation 用来把浏览器地址栏里的所有信息变成响应式数据源,包括:
hrefprotocolhostpathnamehashsearchstate
也就是说: URL 不再只是路由工具,而是一个可以被 Vue 直接监听和驱动 UI 的状态源。
非常适合:
- 做调试面板
- 做页面参数驱动配置
- 不依赖 vue-router 的轻量参数系统
- H5 活动页参数控制
- 页面状态与 URL 同步
下面是完整示例(直接复制进 App.vue 可运行,无需 vue-router):
<script setup lang="ts">
  import { watch } from 'vue'
  import { useBrowserLocation } from '@vueuse/core'

  /**
   * 获取浏览器地址的响应式对象
   */
  const location = useBrowserLocation()

  /**
   * 监听 hash 变化示例
   */
  watch(
      () => location.value.hash,
      (newHash) => {
        console.log('Hash changed:', newHash)
      }
  )
</script>

<template>
  <div class="container">
    <h1>useBrowserLocation(URL / Hash / Query 响应式)</h1>

    <div class="card">
      <h2>基础信息</h2>
      <ul>
        <li>完整地址:{{ location.href }}</li>
        <li>协议:{{ location.protocol }}</li>
        <li>主机:{{ location.host }}</li>
        <li>路径:{{ location.pathname }}</li>
      </ul>
    </div>

    <div class="card">
      <h2>Hash 信息</h2>
      <p>{{ location.hash || '(当前没有 hash)' }}</p>
      <button @click="location.hash = '#section-a'">设置 #section-a</button>
      <button @click="location.hash = '#section-b'">设置 #section-b</button>
      <button @click="location.hash = ''">清空 hash</button>
    </div>

    <div class="card">
      <h2>Query 参数</h2>
      <p>search:{{ location.search || '(无参数)' }}</p>
      <div class="btn-group">
        <button @click="location.search = '?page=1&size=10'">设置参数</button>
        <button @click="location.search = '?page=2&size=20'">切换参数</button>
        <button @click="location.search = ''">清空参数</button>
      </div>
    </div>

    <div class="card tip">
      <h2>说明</h2>
      <ul>
        <li>URL 的变化会立即触发视图更新</li>
        <li>手动修改地址栏也会同步到页面</li>
        <li>适合做无路由的参数驱动系统</li>
        <li>配合 useUrlSearchParams 能做更强的参数操作</li>
      </ul>
    </div>
  </div>
</template>

<style scoped>
  .container {
    padding: 24px;
    font-family: Arial, Helvetica, sans-serif;
  }

  .card {
    border: 1px solid #dcdcdc;
    border-radius: 6px;
    padding: 16px;
    margin-bottom: 16px;
  }

  .card h2 {
    margin: 0 0 12px 0;
    font-size: 16px;
  }

  button {
    padding: 6px 14px;
    border: none;
    border-radius: 4px;
    background-color: #409eff;
    color: #fff;
    cursor: pointer;
    margin-right: 8px;
  }

  button:hover {
    opacity: 0.9;
  }

  .btn-group button {
    margin-bottom: 8px;
  }

  .tip {
    background-color: #f8f8f8;
  }
</style>useCssVar(CSS 变量响应式控制)
useCssVar 用来把 CSS 变量(--xxx) 直接变成 Vue 的响应式数据。 你可以用 JS 改 CSS,用 CSS 驱动主题,用 Vue 控制动画与样式系统。
一句话总结:
让样式系统进入响应式世界
在真实项目里常用于:
- 主题色切换(主色 / 成功色 / 警告色)
- 暗黑模式配色
- 动态尺寸(高度、宽度、间距)
- 大屏系统主题配置
- 可视化系统皮肤配置
下面是完整示例(可直接放进 App.vue 运行):
<script setup lang="ts">
  import {ref, computed, type Ref} from 'vue'
  import { useCssVar } from '@vueuse/core'

  /**
   * 目标 DOM 元素
   */
  const boxRef = ref<HTMLElement | null>(null)

  /**
   * CSS 变量绑定
   */
  const mainColor = useCssVar('--main-color', boxRef, {
    initialValue: '#409eff',
  })as Ref<string>

  const boxSize = useCssVar('--box-size', boxRef, {
    initialValue: '120px',
  })as Ref<string>

  /**
   * boxSize 用于 range 输入(纯数字)
   * 需要在 computed 里转换 px
   */
  const boxSizeValue = computed({
    get() {
      return parseInt(boxSize.value.replace('px', ''))
    },
    set(v: number) {
      boxSize.value = `${v}px`
    },
  })
</script>

<template>
  <div class="container">
    <h1>useCssVar(CSS 变量响应式控制)</h1>

    <div class="card">
      <h2>动态控制 CSS 变量</h2>

      <div class="form">
        <label>
          主题颜色:
          <input type="color" v-model="mainColor" />
          <span>{{ mainColor }}</span>
        </label>

        <label>
          盒子尺寸:
          <input type="range" min="60" max="200" v-model="boxSizeValue" />
          <span>{{ boxSizeValue }}px</span>
        </label>
      </div>
    </div>

    <div class="card">
      <h2>效果预览</h2>
      <div ref="boxRef" class="box">
        动态样式盒子
      </div>
    </div>

    <div class="card tip">
      <h2>说明</h2>
      <ul>
        <li>CSS 变量和 ref 是双向绑定的</li>
        <li>适合做主题系统与动态样式</li>
        <li>不需要操作 DOM 的 style</li>
      </ul>
    </div>
  </div>
</template>

<style scoped>
  .container {
    padding: 24px;
    font-family: Arial, Helvetica, sans-serif;
  }

  .card {
    border: 1px solid #dcdcdc;
    border-radius: 6px;
    padding: 16px;
    margin-bottom: 16px;
  }

  .form label {
    display: block;
    margin-bottom: 12px;
  }

  .box {
    --box-size: 120px;
    --main-color: #409eff;
    width: var(--box-size);
    height: var(--box-size);
    background-color: var(--main-color);
    color: #fff;
    display: flex;
    align-items: center;
    justify-content: center;
    border-radius: 8px;
    transition: all 0.3s ease;
  }

  .tip {
    background-color: #f8f8f8;
  }
</style>这个 Hook 在工程里的真实价值是:
- 你再也不用写:
el.style.backgroundColor = xxx而是:
themeColor.value = '#f56c6c'CSS 变量 + VueUse = 一个完整主题系统的基础设施。
useMediaQuery(媒体查询判断)
useMediaQuery 是把 CSS 里的 @media 查询规则直接搬到 JavaScript 里使用, 并且结果是一个响应式布尔值。
你在 CSS 里写:
@media (max-width: 768px) { ... }在 Vue 里就可以写成:
const isMobile = useMediaQuery('(max-width: 768px)')这让“布局逻辑”和“业务逻辑”都能根据屏幕尺寸做精确控制,而不是只靠样式。
常见应用场景:
- 移动端 / PC 端组件切换
- 控制某些功能只在大屏展示
- 配合 useBreakpoints 做更细粒度判断
- H5 页面适配
- 数据大屏自适应
完整示例(直接放到 App.vue 运行):
<script setup lang="ts">
  import { useMediaQuery } from '@vueuse/core'

  /**
   * 定义多个媒体查询
   */
  const isMobile = useMediaQuery('(max-width: 768px)')
  const isTablet = useMediaQuery('(min-width: 769px) and (max-width: 1024px)')
  const isDesktop = useMediaQuery('(min-width: 1025px)')
</script>

<template>
  <div class="container">
    <h1>useMediaQuery(媒体查询判断)</h1>

    <div class="card">
      <h2>当前设备类型</h2>
      <p class="device">
        <span v-if="isMobile">📱 手机端</span>
        <span v-else-if="isTablet">📲 平板端</span>
        <span v-else-if="isDesktop">🖥 桌面端</span>
        <span v-else>未知设备</span>
      </p>
    </div>

    <div class="card">
      <h2>媒体查询状态</h2>
      <ul>
        <li>isMobile:{{ isMobile }}</li>
        <li>isTablet:{{ isTablet }}</li>
        <li>isDesktop:{{ isDesktop }}</li>
      </ul>
    </div>

    <div class="card">
      <h2>模拟不同端展示不同内容</h2>

      <div v-if="isMobile" class="box mobile">
        这是手机端视图(布局更简单)
      </div>

      <div v-else-if="isTablet" class="box tablet">
        这是平板端视图(中等复杂度)
      </div>

      <div v-else class="box desktop">
        这是桌面端视图(完整功能)
      </div>
    </div>

    <div class="card tip">
      <h2>说明</h2>
      <ul>
        <li>useMediaQuery 本质是 JS 版本的 @media</li>
        <li>非常适合做“逻辑层”的响应式控制</li>
        <li>和 useBreakpoints 可以互补使用</li>
        <li>适合做组件级适配,而不只是样式适配</li>
      </ul>
    </div>
  </div>
</template>

<style scoped>
  .container {
    padding: 24px;
    font-family: Arial, Helvetica, sans-serif;
  }

  .card {
    border: 1px solid #dcdcdc;
    border-radius: 6px;
    padding: 16px;
    margin-bottom: 16px;
  }

  .device {
    font-size: 20px;
    font-weight: bold;
    color: #409eff;
  }

  .box {
    padding: 20px;
    border-radius: 6px;
    color: #fff;
    font-weight: bold;
  }

  .box.mobile {
    background-color: #67c23a;
  }

  .box.tablet {
    background-color: #e6a23c;
  }

  .box.desktop {
    background-color: #409eff;
  }

  .tip {
    background-color: #f8f8f8;
  }
</style>useTitle(动态 document.title)
useTitle 用来把浏览器标签页标题变成一个可响应式控制的状态。 你不再需要手动操作:
document.title = 'xxx'而是只关心:
title.value = 'xxx'在真实项目中常用于:
- 页面标题与业务状态联动
- 未读消息数量提示(如:
(3) 消息中心) - 页面切换时自动修改标题
- SEO 场景下的动态标题
- 后台系统模块名称显示
完整示例(可直接复制进 App.vue 运行):
<script setup lang="ts">
  import { ref, watch } from 'vue'
  import { useTitle } from '@vueuse/core'

  /**
   * 创建一个响应式 title
   * 初始值会直接设置到 document.title
   */
  const title = useTitle('VueUse Demo')

  /**
   * 输入框绑定
   */
  const inputTitle = ref(title.value)

  /**
   * 同步输入框与 document.title
   */
  watch(inputTitle, (val) => {
    title.value = val || 'VueUse Demo'
  })

  /**
   * 模拟未读消息数量
   */
  const unreadCount = ref(0)

  watch(unreadCount, (count) => {
    if (count > 0) {
      title.value = `(${count}) 新消息 - VueUse Demo`
    } else {
      title.value = inputTitle.value || 'VueUse Demo'
    }
  })
</script>

<template>
  <div class="container">
    <h1>useTitle(动态 document.title)</h1>

    <div class="card">
      <h2>自定义页面标题</h2>
      <input
          v-model="inputTitle"
          placeholder="输入新的页面标题"
          class="input"
      />
    </div>

    <div class="card">
      <h2>模拟未读消息</h2>
      <p>当前未读数量:{{ unreadCount }}</p>
      <button @click="unreadCount++">+1</button>
      <button @click="unreadCount = 0">清空</button>
    </div>

    <div class="card tip">
      <h2>说明</h2>
      <ul>
        <li>useTitle 本质是 document.title 的响应式封装</li>
        <li>适合做通知数、页面状态提示</li>
        <li>多个地方修改 title 时要注意统一策略</li>
        <li>可与路由系统配合实现自动标题管理</li>
      </ul>
    </div>
  </div>
</template>

<style scoped>
  .container {
    padding: 24px;
    font-family: Arial, Helvetica, sans-serif;
  }

  .card {
    border: 1px solid #dcdcdc;
    border-radius: 6px;
    padding: 16px;
    margin-bottom: 16px;
  }

  .input {
    width: 100%;
    padding: 6px 10px;
    border: 1px solid #dcdcdc;
    border-radius: 4px;
    outline: none;
  }

  button {
    margin-right: 8px;
    padding: 6px 14px;
    border: none;
    border-radius: 4px;
    background-color: #409eff;
    color: #fff;
    cursor: pointer;
  }

  button:hover {
    opacity: 0.9;
  }

  .tip {
    background-color: #f8f8f8;
  }
</style>useUrlSearchParams(URL 参数读写)
useUrlSearchParams 是专门用来操作 URL 中的 query 参数(?a=1&b=2)的 Hook, 并且这些参数是响应式的、可读可写的、自动同步到地址栏。
你不再需要:
const params = new URLSearchParams(location.search)
params.set('page', '1')
history.replaceState(null, '', `?${params.toString()}`)而是直接:
const params = useUrlSearchParams()
params.page = 1非常适合:
- 分页参数(page / size)
- 搜索条件(keyword / type)
- 筛选条件(status / sort)
- 可分享链接状态
- “URL 即状态”的页面设计
完整示例(直接复制进 App.vue 可运行):
<script setup lang="ts">
  import { computed } from 'vue'
  import { useUrlSearchParams } from '@vueuse/core'

  /**
   * 创建一个响应式的 URL 参数对象
   * 默认使用 history 模式(不会刷新页面)
   */
  const params = useUrlSearchParams('history')

  /**
   * 分页参数(做一层语义化封装)
   */
  const page = computed({
    get: () => Number(params.page || 1),
    set: (val: number) => {
      params.page = String(val)
    },
  })

  const size = computed({
    get: () => Number(params.size || 10),
    set: (val: number) => {
      params.size = String(val)
    },
  })

  /**
   * 搜索关键词
   */
  const keyword = computed({
    get: () => (params.keyword as string) || '',
    set: (val: string) => {
      if (val) {
        params.keyword = val
      } else {
        delete params.keyword
      }
    },
  })
</script>

<template>
  <div class="container">
    <h1>useUrlSearchParams(URL 参数读写)</h1>

    <div class="card">
      <h2>分页参数</h2>
      <p>当前页:{{ page }}</p>
      <p>每页条数:{{ size }}</p>
      <button @click="page--" :disabled="page <= 1">上一页</button>
      <button @click="page++">下一页</button>
      <button @click="size = 10">10 条</button>
      <button @click="size = 20">20 条</button>
      <button @click="size = 50">50 条</button>
    </div>

    <div class="card">
      <h2>搜索参数</h2>
      <input
          v-model="keyword"
          placeholder="请输入搜索关键词"
          class="input"
      />
      <p>当前 keyword:{{ keyword || '(无)' }}</p>
    </div>

    <div class="card">
      <h2>当前 URL 参数对象</h2>
      <pre>{{ params }}</pre>
    </div>

    <div class="card tip">
      <h2>说明</h2>
      <ul>
        <li>参数变化会自动同步到浏览器地址栏</li>
        <li>刷新页面后参数仍然存在</li>
        <li>非常适合分页、筛选、搜索条件管理</li>
        <li>建议业务层永远通过语义变量(page/size/keyword)操作</li>
        <li>URL 就是你的“轻量状态仓库”</li>
      </ul>
    </div>
  </div>
</template>

<style scoped>
  .container {
    padding: 24px;
    font-family: Arial, Helvetica, sans-serif;
  }

  .card {
    border: 1px solid #dcdcdc;
    border-radius: 6px;
    padding: 16px;
    margin-bottom: 16px;
  }

  .input {
    width: 100%;
    padding: 6px 10px;
    border: 1px solid #dcdcdc;
    border-radius: 4px;
    outline: none;
  }

  button {
    margin-right: 8px;
    margin-top: 6px;
    padding: 6px 14px;
    border: none;
    border-radius: 4px;
    background-color: #409eff;
    color: #fff;
    cursor: pointer;
  }

  button:disabled {
    background-color: #cccccc;
    cursor: not-allowed;
  }

  pre {
    background-color: #f8f8f8;
    padding: 12px;
    border-radius: 4px;
    overflow: auto;
  }

  .tip {
    background-color: #f8f8f8;
  }
</style>useFullscreen(全屏模式控制)
useFullscreen 是对浏览器原生 Fullscreen API 的响应式封装,用来非常优雅地控制:
- 进入全屏
- 退出全屏
- 判断当前是否处于全屏状态
- 指定某个元素全屏(而不是整个页面)
你不用再写一堆:
element.requestFullscreen()
document.exitFullscreen()
document.fullscreenElement只关心:
const { isFullscreen, enter, exit, toggle } = useFullscreen(target)在真实项目中非常常见于:
- 数据大屏 / 可视化系统
- 视频播放全屏
- 图片预览全屏
- 编辑器专注模式
- 监控面板放大查看
完整示例(直接放进 App.vue 可运行):
<script setup lang="ts">
  import { ref } from 'vue'
  import { useFullscreen } from '@vueuse/core'

  /**
   * 需要全屏的目标元素
   */
  const boxRef = ref<HTMLElement | null>(null)

  /**
   * 使用 useFullscreen
   * 只让指定元素进入全屏,而不是整个 document
   */
  const {
    isFullscreen,
    enter,
    exit,
    toggle,
    isSupported,
  } = useFullscreen(boxRef)
</script>

<template>
  <div class="container">
    <h1>useFullscreen(全屏模式控制)</h1>

    <div class="card">
      <h2>全屏状态</h2>
      <p>
        浏览器是否支持:{{ isSupported ? '支持' : '不支持' }}
      </p>
      <p>
        当前是否全屏:{{ isFullscreen ? '是' : '否' }}
      </p>
    </div>

    <div class="card">
      <h2>操作</h2>
      <button @click="enter">进入全屏</button>
      <button @click="exit">退出全屏</button>
      <button @click="toggle">切换全屏</button>
    </div>

    <div class="card">
      <h2>全屏目标元素</h2>
      <div ref="boxRef" class="fullscreen-box">
        <p>这个区域会进入全屏</p>
        <p>当前状态:{{ isFullscreen ? '全屏中' : '普通模式' }}</p>
      </div>
    </div>

    <div class="card tip">
      <h2>说明</h2>
      <ul>
        <li>可以指定某个 DOM 元素进入全屏,而不是整个页面</li>
        <li>isFullscreen 是响应式状态,可驱动 UI</li>
        <li>toggle 在业务中非常常用(一个按钮搞定)</li>
        <li>适合大屏系统、可视化面板、播放器类页面</li>
      </ul>
    </div>
  </div>
</template>

<style scoped>
  .container {
    padding: 24px;
    font-family: Arial, Helvetica, sans-serif;
  }

  .card {
    border: 1px solid #dcdcdc;
    border-radius: 6px;
    padding: 16px;
    margin-bottom: 16px;
  }

  button {
    margin-right: 8px;
    margin-top: 6px;
    padding: 6px 14px;
    border: none;
    border-radius: 4px;
    background-color: #409eff;
    color: #ffffff;
    cursor: pointer;
  }

  button:hover {
    opacity: 0.9;
  }

  .fullscreen-box {
    height: 200px;
    border-radius: 8px;
    background: linear-gradient(135deg, #409eff, #67c23a);
    color: #ffffff;
    display: flex;
    flex-direction: column;
    align-items: center;
    justify-content: center;
    font-size: 18px;
    font-weight: bold;
  }

  .tip {
    background-color: #f8f8f8;
  }
</style>useBroadcastChannel(多标签页通信)
useBroadcastChannel 是基于浏览器原生 BroadcastChannel API 的封装,用来实现同一站点下多个标签页 / 窗口 / iframe 之间的实时通信。
一句话概括:
一个页面发消息,所有打开着的同域页面都会立刻收到。
非常适合这些真实场景:
- 多标签页登录状态同步(一个退出,全退出)
- Token 失效广播
- 主题色 / 暗黑模式同步
- 多窗口协同编辑
- 多页面实时通知
这类需求用 localStorage 轮询非常丑,而 useBroadcastChannel 是正解。
最小可运行示例(开两个浏览器标签页测试效果)
<script setup lang="ts">
  import { ref, watch } from 'vue'
  import { useBroadcastChannel } from '@vueuse/core'

  /**
   * 频道名:同一个名字的频道才能互相通信
   */
  const CHANNEL_NAME = 'demo-broadcast-channel'

  /**
   * 输入内容
   */
  const input = ref('')

  /**
   * 消息记录
   */
  const messages = ref<string[]>([])

  /**
   * 使用 useBroadcastChannel
   */
  const {
    data,
    post,
    close,
  } = useBroadcastChannel<string, string>({
    name: CHANNEL_NAME,
  })

  /**
   * 监听接收的消息
   */
  watch(data, (val) => {
    if (val) {
      messages.value.push(`收到:${val}`)
    }
  })

  /**
   * 发送消息
   */
  const sendMessage = () => {
    if (!input.value) return
    post(input.value)
    messages.value.push(`我发送:${input.value}`)
    input.value = ''
  }
</script>

<template>
  <div class="container">
    <h1>useBroadcastChannel(多标签页通信)</h1>

    <div class="card">
      <h2>发送消息</h2>
      <input
          v-model="input"
          class="input"
          placeholder="输入内容,在其他标签页会同步收到"
          @keyup.enter="sendMessage"
      />
      <button @click="sendMessage">发送</button>
      <button @click="close">关闭频道</button>
    </div>

    <div class="card">
      <h2>消息记录</h2>
      <div class="log">
        <div
            v-for="(item, index) in messages"
            :key="index"
            class="log-item"
        >
          {{ item }}
        </div>
      </div>
    </div>

    <div class="card tip">
      <h2>说明</h2>
      <ul>
        <li>同一域名下多个标签页共享同一个频道</li>
        <li>频道名必须一致,否则收不到消息</li>
        <li>通信是即时的,不需要刷新页面</li>
        <li>post 是广播,不是点对点</li>
        <li>close 用于主动关闭当前页面的频道监听</li>
      </ul>
    </div>
  </div>
</template>

<style scoped>
  .container {
    padding: 24px;
    font-family: Arial, Helvetica, sans-serif;
  }

  .card {
    border: 1px solid #dcdcdc;
    border-radius: 6px;
    padding: 16px;
    margin-bottom: 16px;
  }

  .input {
    width: 70%;
    padding: 6px 10px;
    border: 1px solid #dcdcdc;
    border-radius: 4px;
    margin-right: 8px;
  }

  button {
    padding: 6px 14px;
    border: none;
    border-radius: 4px;
    background-color: #409eff;
    color: #ffffff;
    cursor: pointer;
  }

  button:hover {
    opacity: 0.9;
  }

  .log {
    max-height: 200px;
    overflow-y: auto;
    background-color: #f8f8f8;
    padding: 10px;
    border-radius: 4px;
  }

  .log-item {
    font-size: 14px;
    margin-bottom: 4px;
  }

  .tip {
    background-color: #f8f8f8;
  }
</style>时间 / 定时器 / 节流防抖(时间相关)
useNow(实时 Date 对象,自动更新)
📌 说明:useNow() 会返回一个响应式的 Date() 对象,每秒自动更新。
示例:
import { useNow } from '@vueuse/core'

const now = useNow()

// now.value = Date 对象,例如:2026-01-11T13:26:30.000Z在模板中:
<div>{{ now }}</div>或者格式化显示:
<div>{{ now.toLocaleTimeString() }}</div>useTimestamp(实时毫秒时间戳)
📌 返回 number,每毫秒更新
import { useTimestamp } from '@vueuse/core'

const ts = useTimestamp()

// ts.value = 1700000000000(实时变化)模板:
<div>{{ ts }}</div>useDateFormat(格式化时间)
📌 类似 dayjs.format()
import { useDateFormat, useNow } from '@vueuse/core'

const now = useNow()
const formatted = useDateFormat(now, 'YYYY-MM-DD HH:mm:ss')

// formatted.value = '2026-01-11 13:45:30'useTimeAgo(多久以前)
📌 转换时间
import { useTimeAgo } from '@vueuse/core'

const ago = useTimeAgo(Date.now() - 5 * 60 * 1000)

// ago.value = '5 minutes ago'转换成中文时间
import { useTimeAgo, type UseTimeAgoMessages } from '@vueuse/core'

const messages: UseTimeAgoMessages = {
    justNow: '刚刚',
    invalid: '无效时间',
    past: (v: string) => `${v}前`,
    future: (v: string) => `${v}后`,
    second: (v: number) => `${v}秒`,
    minute: (v: number) => `${v}分钟`,
    hour: (v: number) => `${v}小时`,
    day: (v: number) => `${v}天`,
    week: (v: number) => `${v}周`,
    month: (v: number) => `${v}个月`,
    year: (v: number) => `${v}年`,
}

const ago = useTimeAgo(Date.now() - 5 * 60 * 1000, {
    messages,
})useTimeout(延时执行一次)
📌 指定时间后 ready = true
import { useTimeout } from '@vueuse/core'

const ready = useTimeout(2000) // 2秒后变true

// ready.value: false → trueuseTimeoutFn(延时执行函数)
📌 指定时间后执行回调
import { useTimeoutFn } from '@vueuse/core'

const { start, stop } = useTimeoutFn(() => {
    console.log('2秒到了!')
}, 2000)

start()useInterval(固定间隔计数)
📌 counter++ 间隔执行
import { useInterval } from '@vueuse/core'

const counter = useInterval(1000) // 每秒+1useIntervalFn(定时执行回调)
📌 类似 setInterval,可暂停
import { useIntervalFn } from '@vueuse/core'

const { pause, resume } = useIntervalFn(() => {
    console.log('tick')
}, 1000)

resume()useRafFn(requestAnimationFrame)
📌 高性能 UI 动画/渲染循环
import { useRafFn } from '@vueuse/core'

useRafFn(() => {
    // 每帧执行
    console.log('frame')
})useToNumber(值转数字)
📌 用于时间戳、输入框校验
import { ref } from 'vue'
import { useToNumber } from '@vueuse/core'

const input = ref('1700000000000')
const num = useToNumber(input)

// num.value = 1700000000000useToString(值转字符串)
📌 和上面相反
import { ref } from 'vue'
import { useToString } from '@vueuse/core'

const timestamp = ref(1700000000000)
const str = useToString(timestamp)

// str.value = "1700000000000"时间倒计时
时间型倒计时(算还剩多少时间)
<template>
  <div class="countdown">
    剩余时间:{{ format }}
  </div>
</template>

<script setup lang="ts">
import { computed } from 'vue';
import { useNow } from '@vueuse/core';

// 结束时间:比如 1 分钟后
const endTime = Date.now() + 60 * 1000;

// 每秒更新一次当前时间
const now = useNow({ interval: 1000 });

// 剩余秒数
const remain = computed(() => {
  const diff = endTime - now.value.getTime();
  return Math.max(0, Math.ceil(diff / 1000));
});

// 格式化成 mm:ss
const format = computed(() => {
  const m = Math.floor(remain.value / 60);
  const s = remain.value % 60;
  return `${m.toString().padStart(2, '0')}:${s.toString().padStart(2, '0')}`;
});
</script>倒计时
计数器型倒计时(减 1、减 1、减 1)
基础使用
<template>
  <div>
    剩余:{{ remaining }}
    <div>
      <button @click="start()">开始</button>
      <button @click="pause()">暂停</button>
      <button @click="resume()">继续</button>
      <button @click="reset()">重置</button>
      <button @click="stop()">停止</button>
    </div>
  </div>
</template>

<script setup lang="ts">
import { useCountdown } from '@vueuse/core';

const {
  remaining,
  start,
  pause,
  resume,
  reset,
  stop,
} = useCountdown(10); // 10 秒倒计时
</script>完整使用
<template>
  <div class="panel">
    <h3>useCountdown 全量示例</h3>

    <div>剩余秒数:{{ remaining }}</div>
    <div>格式化:{{ format }}</div>
    <div>是否运行中:{{ isActive }}</div>

    <div class="buttons">
      <button @click="start()">start()</button>
      <button @click="start(20)">start(20)</button>

      <button @click="pause()">pause()</button>
      <button @click="resume()">resume()</button>

      <button @click="reset()">reset()</button>
      <button @click="reset(5)">reset(5)</button>

      <button @click="stop()">stop()</button>
    </div>
  </div>
</template>

<script setup lang="ts">
import { computed, ref } from 'vue';
import { useCountdown } from '@vueuse/core';

const tickCount = ref(0);

/**
 * useCountdown 完整参数示例
 */
const {
  remaining,
  start,
  pause,
  resume,
  reset,
  stop,
  isActive,
} = useCountdown(10, {
  interval: 1000,         // 每 1 秒递减一次(支持 ref / computed)
  immediate: false,      // 不自动启动,手动 start()
  onTick: () => {
    tickCount.value++;
    console.log(`⏱ tick:第 ${tickCount.value} 次,剩余 ${remaining.value}s`);
  },
  onComplete: () => {
    console.log('🎯 倒计时结束');
  },
});

/**
 * mm:ss 格式化
 */
const format = computed(() => {
  const m = Math.floor(remaining.value / 60);
  const s = remaining.value % 60;
  return `${m.toString().padStart(2, '0')}:${s.toString().padStart(2, '0')}`;
});
</script>

<style scoped>
.panel {
  padding: 16px;
  border: 1px solid #ccc;
  width: 300px;
}
.buttons {
  margin-top: 10px;
  display: grid;
  grid-template-columns: repeat(2, 1fr);
  gap: 6px;
}
button {
  padding: 4px 6px;
}
</style>传感器 / 用户交互(UI 体验)
onClickOutside(点击外部关闭组件)
onClickOutside 是 VueUse 里使用频率极高的一个 Hook,用来监听:
当用户点击某个元素“外部”时触发回调
这是所有弹层组件的灵魂:
- 下拉菜单
- 弹窗
- Popover
- Select 下拉框
- 右键菜单
- 模态层
几乎所有「点外面关闭」的交互,都靠它完成。
最小可运行示例(标准弹窗关闭)
<script setup lang="ts">
import { ref } from 'vue'
import { onClickOutside } from '@vueuse/core'

/**
 * 弹窗是否显示
 */
const visible = ref(false)

/**
 * 弹窗 DOM 引用
 */
const popupRef = ref<HTMLElement | null>(null)

/**
 * 监听点击弹窗外部
 */
onClickOutside(popupRef, () => {
  visible.value = false
})
</script>

<template>
  <div class="container">
    <h1>onClickOutside(点击外部关闭组件)</h1>

    <button @click="visible = true">打开弹窗</button>

    <div
      v-if="visible"
      ref="popupRef"
      class="popup"
    >
      <h3>我是弹窗</h3>
      <p>点击弹窗外部区域会自动关闭</p>
    </div>
  </div>
</template>

<style scoped>
.container {
  padding: 24px;
}

button {
  padding: 6px 14px;
  border: none;
  background-color: #409eff;
  color: #ffffff;
  border-radius: 4px;
  cursor: pointer;
}

.popup {
  width: 260px;
  margin-top: 16px;
  padding: 16px;
  border: 1px solid #dcdcdc;
  border-radius: 6px;
  background-color: #ffffff;
  box-shadow: 0 4px 12px rgba(0, 0, 0, 0.15);
}
</style>useIntersectionObserver(元素可见性监听 / 懒加载)
useIntersectionObserver 是对浏览器 IntersectionObserver 的响应式封装,用来判断:
一个元素是否进入了视口(可见区域)
这是实现以下功能的核心:
- 图片懒加载
- 列表懒加载 / 无限滚动
- 页面曝光埋点
- 组件进入视口才渲染
- 动画触发时机控制
完整可运行示例(模拟懒加载区块)
<script setup lang="ts">
import { ref } from 'vue'
import { useIntersectionObserver } from '@vueuse/core'

/**
 * 被监听的目标元素
 */
const targetRef = ref<HTMLElement | null>(null)

/**
 * 是否已经进入视口
 */
const isVisible = ref(false)

/**
 * 使用 useIntersectionObserver
 */
useIntersectionObserver(
  targetRef,
  ([{ isIntersecting }]) => {
    isVisible.value = isIntersecting
  },
  {
    threshold: 0.3,
  }
)
</script>

<template>
  <div class="container">
    <h1>useIntersectionObserver(元素可见性监听 / 懒加载)</h1>

    <p>向下滚动,当灰色区域进入视口时触发加载效果</p>

    <!-- 制造滚动空间 -->
    <div class="spacer">上方占位区域</div>

    <div ref="targetRef" class="observer-box">
      <template v-if="isVisible">
        <h2>内容已加载</h2>
        <p>这个内容是进入视口后才显示的</p>
      </template>
      <template v-else>
        <h2>等待进入视口...</h2>
      </template>
    </div>

    <div class="spacer">下方占位区域</div>
  </div>
</template>

<style scoped>
.container {
  padding: 24px;
}

.spacer {
  height: 500px;
  background: repeating-linear-gradient(
    45deg,
    #f2f2f2,
    #f2f2f2 10px,
    #e5e5e5 10px,
    #e5e5e5 20px
  );
  display: flex;
  align-items: center;
  justify-content: center;
  color: #888888;
}

.observer-box {
  height: 200px;
  margin: 40px 0;
  border-radius: 8px;
  background-color: #409eff;
  color: #ffffff;
  display: flex;
  flex-direction: column;
  align-items: center;
  justify-content: center;
}
</style>useElementSize(元素尺寸响应式)
useElementSize 是对 ResizeObserver 的高级封装,用来让某个 DOM 元素的:
- 宽度(width)
- 高度(height)
变成响应式数据。
这是做以下功能的核心能力:
- 图表组件自适应父容器
- 拖拽面板尺寸变化
- 自适应卡片布局
- 编辑器 / 大屏组件自动重算尺寸
完整可运行示例(元素尺寸实时监听)
<script setup lang="ts">
import { ref } from 'vue'
import { useElementSize } from '@vueuse/core'

/**
 * 目标元素
 */
const boxRef = ref<HTMLElement | null>(null)

/**
 * 使用 useElementSize
 */
const { width, height } = useElementSize(boxRef)
</script>

<template>
  <div class="container">
    <h1>useElementSize(元素尺寸响应式)</h1>

    <div ref="boxRef" class="resize-box">
      <p>拖动浏览器窗口改变这个区域大小</p>
      <p>宽度:{{ width }} px</p>
      <p>高度:{{ height }} px</p>
    </div>
  </div>
</template>

<style scoped>
.container {
  padding: 24px;
}

.resize-box {
  resize: both;
  overflow: auto;
  width: 300px;
  height: 200px;
  border: 2px dashed #409eff;
  border-radius: 6px;
  padding: 12px;
  box-sizing: border-box;
  background-color: #f5f9ff;
}
</style>useMouseInElement(鼠标在元素内的位置)
useMouseInElement 用来获取鼠标相对于某个元素内部的位置坐标,而不是相对于整个窗口。
它会给你一组非常实用的响应式数据:
elementX/elementY→ 鼠标在元素内部的坐标elementWidth/elementHeight→ 元素尺寸isOutside→ 鼠标是否已移出元素
典型应用:
- 图片放大镜
- hover 高亮区域
- 跟随鼠标的小提示
- 图表 tooltip 自定义定位
- 卡片 3D 跟随效果
完整可运行示例(鼠标跟随点)
<script setup lang="ts">
import { ref } from 'vue'
import { useMouseInElement } from '@vueuse/core'

/**
 * 目标元素
 */
const boxRef = ref<HTMLElement | null>(null)

/**
 * 使用 useMouseInElement
 */
const {
  elementX,
  elementY,
  isOutside,
} = useMouseInElement(boxRef)
</script>

<template>
  <div class="container">
    <h1>useMouseInElement(鼠标在元素内的位置)</h1>

    <div ref="boxRef" class="mouse-box">
      <div
        v-if="!isOutside"
        class="dot"
        :style="{
          left: elementX + 'px',
          top: elementY + 'px',
        }"
      ></div>
      <p class="info">
        X: {{ Math.round(elementX) }} ,
        Y: {{ Math.round(elementY) }}
      </p>
    </div>
  </div>
</template>

<style scoped>
.container {
  padding: 24px;
}

.mouse-box {
  position: relative;
  width: 400px;
  height: 260px;
  border: 2px solid #409eff;
  border-radius: 8px;
  background-color: #f0f6ff;
  overflow: hidden;
}

.dot {
  position: absolute;
  width: 10px;
  height: 10px;
  background-color: #f56c6c;
  border-radius: 50%;
  transform: translate(-50%, -50%);
  pointer-events: none;
}

.info {
  position: absolute;
  left: 10px;
  bottom: 10px;
  background: rgba(255, 255, 255, 0.8);
  padding: 4px 8px;
  border-radius: 4px;
  font-size: 12px;
}
</style>useResizeObserver(DOM 尺寸变化监听)
useResizeObserver 是对浏览器原生 ResizeObserver 的响应式封装,用来监听某个 DOM 元素尺寸变化时触发回调。
它比 useElementSize 更“底层”,适合这些场景:
- 你不只关心宽高,还要自己处理更多逻辑
- 图表组件 resize
- 虚拟列表重新计算布局
- 复杂容器尺寸变化联动
- 自定义自适应算法
一句话定位:
useResizeObserver = ResizeObserver 的 Vue 响应式工程版
完整可运行示例(监听并显示元素尺寸变化)
<script setup lang="ts">
import { ref } from 'vue'
import { useResizeObserver } from '@vueuse/core'

/**
 * 目标元素
 */
const boxRef = ref<HTMLElement | null>(null)

/**
 * 当前尺寸信息
 */
const size = ref({
  width: 0,
  height: 0,
})

/**
 * 使用 useResizeObserver 监听尺寸变化
 */
useResizeObserver(boxRef, (entries) => {
  const entry = entries[0]
  if (!entry) return
  const { width, height } = entry.contentRect
  size.value.width = Math.round(width)
  size.value.height = Math.round(height)
})
</script>

<template>
  <div class="container">
    <h1>useResizeObserver(DOM 尺寸变化监听)</h1>

    <div ref="boxRef" class="resize-box">
      <p>拖动右下角改变大小</p>
      <p>当前宽度:{{ size.width }} px</p>
      <p>当前高度:{{ size.height }} px</p>
    </div>
  </div>
</template>

<style scoped>
.container {
  padding: 24px;
}

.resize-box {
  resize: both;
  overflow: auto;
  width: 300px;
  height: 200px;
  border: 2px solid #67c23a;
  border-radius: 6px;
  padding: 12px;
  box-sizing: border-box;
  background-color: #f0f9eb;
}
</style>useMagicKeys(键盘快捷键与组合键监听)
useMagicKeys 用来将键盘按键状态变成响应式数据,让你可以非常优雅地实现:
- 单键监听(Enter、Esc、Space…)
- 组合键(Ctrl + S、Ctrl + Shift + K…)
- 连续操作快捷键
- 全局快捷键系统
这是做:
- 编辑器类系统
- 后台管理系统快捷键
- 设计工具
- 大屏系统快捷操作
的必备 Hook。
完整可运行示例(监听常见快捷键)
<script setup lang="ts">
import { watch } from 'vue'
import { useMagicKeys } from '@vueuse/core'

/**
 * 使用 useMagicKeys
 */
const keys = useMagicKeys()

/**
 * 定义快捷键
 */
const ctrlS = keys['Ctrl+S']
const esc = keys.Escape
const enter = keys.Enter
const ctrlShiftK = keys['Ctrl+Shift+K']
</script>

<template>
  <div class="container">
    <h1>useMagicKeys(键盘快捷键与组合键监听)</h1>

    <div class="card">
      <p>按下:</p>
      <ul>
        <li><b>Ctrl + S</b> → 模拟保存</li>
        <li><b>Enter</b> → 确认操作</li>
        <li><b>Esc</b> → 取消操作</li>
        <li><b>Ctrl + Shift + K</b> → 组合操作</li>
      </ul>
    </div>

    <div class="card status">
      <p>Ctrl + S:{{ ctrlS ? '按下中' : '未按下' }}</p>
      <p>Enter:{{ enter ? '按下中' : '未按下' }}</p>
      <p>Esc:{{ esc ? '按下中' : '未按下' }}</p>
      <p>Ctrl + Shift + K:{{ ctrlShiftK ? '按下中' : '未按下' }}</p>
    </div>
  </div>
</template>

<style scoped>
.container {
  padding: 24px;
}

.card {
  border: 1px solid #dcdcdc;
  padding: 12px;
  border-radius: 6px;
  margin-bottom: 12px;
}

.status p {
  font-family: monospace;
}
</style>更工程化写法(只在触发时执行一次逻辑):
import { watch } from 'vue'

watch(ctrlS, (v) => {
  if (v) {
    console.log('触发保存逻辑')
  }
})

watch(esc, (v) => {
  if (v) {
    console.log('触发取消逻辑')
  }
})useIdle(用户闲置检测)
useIdle 用来检测用户是否在一段时间内没有任何操作行为,并将状态变成响应式数据。
它内部监听:
- 鼠标移动
- 键盘输入
- 点击
- 触摸
- 滚动等
常见业务场景:
- 后台系统自动退出登录
- 页面长时间无操作锁屏
- 重要操作前的活跃校验
- 提示“你还在吗?”
一句话定位:
useIdle = 前端版“心跳检测”
完整可运行示例(10 秒无操作即进入闲置)
<script setup lang="ts">
import {useIdle} from '@vueuse/core'

/**
 * 10 秒无操作视为闲置
 */
const {
  idle,
  lastActive,
} = useIdle(10_000)
</script>

<template>
  <div class="container">
    <h1>useIdle(用户闲置检测)</h1>

    <div class="card">
      <p>状态:{{ idle ? '闲置中' : '活跃中' }}</p>
      <p>最后一次操作时间:{{ new Date(lastActive).toLocaleTimeString() }}</p>
    </div>

    <div class="tip">
      <p>尝试:</p>
      <ul>
        <li>保持不操作 10 秒 → 进入闲置</li>
        <li>移动鼠标或点击 → 立刻恢复活跃</li>
      </ul>
    </div>
  </div>
</template>

<style scoped>
.container {
  padding: 24px;
}

.card {
  border: 1px solid #dcdcdc;
  padding: 12px;
  border-radius: 6px;
  margin-bottom: 12px;
}

.tip {
  background-color: #f8f8f8;
  padding: 12px;
  border-radius: 6px;
}
</style>状态 & 响应式增强(工程核心)
useAsyncState(异步状态管理)
useAsyncState 是 VueUse 里最“工程化”的 Hook 之一,它把你平时手写的:
- loading
- error
- data
- retry
- 执行状态控制
全部封装成一个标准模型。
一句话定位:
useAsyncState = async + loading + error 的标准化解决方案
在真实项目中,它几乎就是:
const { state, isLoading, error, execute } = useAsyncState(...)替代你 10 多行样板代码。
完整可运行示例(模拟接口请求)
<script setup lang="ts">
import { useAsyncState } from '@vueuse/core'

/**
 * 模拟一个异步接口
 */
function mockRequest() {
  return new Promise<string>((resolve, reject) => {
    setTimeout(() => {
      if (Math.random() > 0.3) {
        resolve('请求成功:' + new Date().toLocaleTimeString())
      } else {
        reject(new Error('请求失败,请重试'))
      }
    }, 1500)
  })
}

/**
 * 使用 useAsyncState
 */
const {
  state,
  isLoading,
  error,
  execute,
} = useAsyncState(mockRequest, '', {
  immediate: false,
})
</script>

<template>
  <div class="container">
    <h1>useAsyncState(异步状态管理)</h1>

    <button @click="execute()" :disabled="isLoading">
      {{ isLoading ? '请求中...' : '发送请求' }}
    </button>

    <div class="card">
      <p v-if="isLoading">加载中...</p>
      <p v-else-if="error">错误:{{ error }}</p>
      <p v-else>结果:{{ state }}</p>
    </div>
  </div>
</template>

<style scoped>
.container {
  padding: 24px;
}

button {
  padding: 6px 14px;
  border: none;
  border-radius: 4px;
  background-color: #409eff;
  color: #ffffff;
  cursor: pointer;
}

button:disabled {
  background-color: #a0cfff;
  cursor: not-allowed;
}

.card {
  margin-top: 16px;
  padding: 12px;
  border: 1px solid #dcdcdc;
  border-radius: 6px;
}
</style>useRefHistory(状态历史 / 撤销重做)
useRefHistory 用来给任意一个 ref 增加“历史记录能力”,也就是:
- 记录每一次状态变化
- 支持撤销(undo)
- 支持重做(redo)
- 非常适合表单编辑、画布编辑、配置修改等场景
一句话定位:
useRefHistory = 前端 Undo / Redo 的标准实现
完整可运行示例(文本编辑撤销/重做)
<script setup lang="ts">
import { ref } from 'vue'
import { useRefHistory } from '@vueuse/core'

/**
 * 被记录历史的状态
 */
const text = ref('Hello VueUse')

/**
 * 使用 useRefHistory
 */
const {
  history,
  undo,
  redo,
  canUndo,
  canRedo,
  clear,
} = useRefHistory(text, {
  capacity: 20,
})
</script>

<template>
  <div class="container">
    <h1>useRefHistory(状态历史 / 撤销重做)</h1>

    <textarea
      v-model="text"
      rows="4"
      class="input"
      placeholder="修改内容后尝试撤销 / 重做"
    ></textarea>

    <div class="actions">
      <button @click="undo" :disabled="!canUndo">撤销 Undo</button>
      <button @click="redo" :disabled="!canRedo">重做 Redo</button>
      <button @click="clear">清空历史</button>
    </div>

    <div class="card">
      <p>当前值:{{ text }}</p>
      <p>历史长度:{{ history.length }}</p>
      <p>可撤销:{{ canUndo }}</p>
      <p>可重做:{{ canRedo }}</p>
    </div>
  </div>
</template>

<style scoped>
.container {
  padding: 24px;
}

.input {
  width: 100%;
  padding: 8px;
  box-sizing: border-box;
  font-size: 14px;
}

.actions {
  margin-top: 12px;
}

.actions button {
  margin-right: 8px;
  padding: 6px 14px;
  border: none;
  border-radius: 4px;
  background-color: #409eff;
  color: #ffffff;
  cursor: pointer;
}

.actions button:disabled {
  background-color: #a0cfff;
  cursor: not-allowed;
}

.card {
  margin-top: 16px;
  padding: 12px;
  border: 1px solid #dcdcdc;
  border-radius: 6px;
}
</style>createGlobalState(全局状态容器)
createGlobalState 用来创建一个真正的全局响应式状态, 无论在多少个组件中调用,拿到的都是同一份数据实例。
它本质上就是 VueUse 给你提供的一个“轻量版全局 Store”。
一句话定位:
createGlobalState = 不用 Pinia / Vuex 也能优雅管理全局状态
非常适合:
- 用户信息
- 主题设置
- 权限数据
- 全局配置
- 是否登录状态
完整可运行示例(在 App.vue 里模拟多个组件共享状态)
<script setup lang="ts">
import { ref } from 'vue'
import { createGlobalState } from '@vueuse/core'

/**
 * 创建一个全局状态
 * 只会初始化一次
 */
const useGlobalCounter = createGlobalState(() => {
  const count = ref(0)

  function increment() {
    count.value++
  }

  function decrement() {
    count.value--
  }

  function reset() {
    count.value = 0
  }

  return {
    count,
    increment,
    decrement,
    reset,
  }
})

/**
 * 模拟两个“组件”同时使用同一个全局状态
 */
const counterA = useGlobalCounter()
const counterB = useGlobalCounter()
</script>

<template>
  <div class="container">
    <h1>createGlobalState(全局状态容器)</h1>

    <div class="card">
      <h2>组件 A</h2>
      <p>count:{{ counterA.count }}</p>
      <button @click="counterA.increment">+1</button>
      <button @click="counterA.decrement">-1</button>
    </div>

    <div class="card">
      <h2>组件 B</h2>
      <p>count:{{ counterB.count }}</p>
      <button @click="counterB.increment">+1</button>
      <button @click="counterB.decrement">-1</button>
      <button @click="counterB.reset">重置</button>
    </div>

    <div class="card result">
      <h2>说明</h2>
      <p>无论操作 A 还是 B,本质都在修改同一个全局状态。</p>
      <p>这就是 createGlobalState 的核心价值。</p>
    </div>
  </div>
</template>

<style scoped>
.container {
  padding: 24px;
  font-family: Arial, Helvetica, sans-serif;
}

.card {
  border: 1px solid #dcdcdc;
  border-radius: 6px;
  padding: 16px;
  margin-bottom: 16px;
}

button {
  margin-right: 6px;
  padding: 6px 12px;
  border: none;
  border-radius: 4px;
  background-color: #409eff;
  color: #ffffff;
  cursor: pointer;
}

button:hover {
  opacity: 0.9;
}

.result {
  background-color: #f8f8f8;
}
</style>createSharedComposable(共享组合式函数)
createSharedComposable 用来让一个组合式函数在多个地方调用时, 共享同一份内部状态,而不是每次都重新创建一份。
一句话定位:
createSharedComposable = 让普通 useXxx 变成“可共享状态”的 useXxx
适合场景:
- 多个组件共用一个请求结果
- 多个组件共用一个计时器
- 多个组件共用一份缓存数据
- 避免重复初始化副作用逻辑
完整可运行示例(在 App.vue 中模拟多个组件共享一个组合式函数)
<script setup lang="ts">
import { ref } from 'vue'
import { createSharedComposable, useIntervalFn } from '@vueuse/core'

/**
 * 普通组合式函数
 * 内部有状态和副作用
 */
function useSharedCounterBase() {
  const count = ref(0)

  // 每秒自增
  const { pause, resume } = useIntervalFn(() => {
    count.value++
  }, 1000)

  function reset() {
    count.value = 0
  }

  return {
    count,
    pause,
    resume,
    reset,
  }
}

/**
 * 通过 createSharedComposable 包装
 * 多个地方调用时共享同一个实例
 */
const useSharedCounter = createSharedComposable(useSharedCounterBase)

/**
 * 模拟两个“组件”同时使用
 */
const counterA = useSharedCounter()
const counterB = useSharedCounter()
</script>

<template>
  <div class="container">
    <h1>createSharedComposable(共享组合式函数)</h1>

    <div class="card">
      <h2>组件 A</h2>
      <p>count:{{ counterA.count }}</p>
      <button @click="counterA.resume">开始</button>
      <button @click="counterA.pause">暂停</button>
      <button @click="counterA.reset">重置</button>
    </div>

    <div class="card">
      <h2>组件 B</h2>
      <p>count:{{ counterB.count }}</p>
      <button @click="counterB.resume">开始</button>
      <button @click="counterB.pause">暂停</button>
      <button @click="counterB.reset">重置</button>
    </div>

    <div class="card result">
      <h2>说明</h2>
      <p>组件 A 和 组件 B 拿到的是同一个计数器实例。</p>
      <p>无论在哪个地方操作,count 都会同步变化。</p>
      <p>这就是 createSharedComposable 的核心作用。</p>
    </div>
  </div>
</template>

<style scoped>
.container {
  padding: 24px;
  font-family: Arial, Helvetica, sans-serif;
}

.card {
  border: 1px solid #dcdcdc;
  border-radius: 6px;
  padding: 16px;
  margin-bottom: 16px;
}

button {
  margin-right: 6px;
  padding: 6px 12px;
  border: none;
  border-radius: 4px;
  background-color: #409eff;
  color: #ffffff;
  cursor: pointer;
}

button:hover {
  opacity: 0.9;
}

.result {
  background-color: #f8f8f8;
}
</style>实用工具(效率型)
useEventBus(全局事件总线)
useEventBus 提供了一个超轻量级的事件通信机制, 用来在组件之间进行“发布-订阅”式通信,不需要父子关系、不用 props / emit。
一句话定位:
useEventBus = Vue 里的小型 EventEmitter
适合场景:
- 跨组件通知(刷新列表、关闭弹窗)
- 解耦模块之间的通信
- 简单事件广播(不值得上 Pinia 的那种)
完整可运行示例(在 App.vue 中模拟多个组件通信)
<script setup lang="ts">
import { ref } from 'vue'
import { useEventBus } from '@vueuse/core'

/**
 * 创建一个事件总线
 * key 只要保证全局唯一即可
 */
type Message = {
  from: string
  text: string
}

const messageBus = useEventBus<Message>('global-message-bus')

/**
 * 模拟组件 A:发送消息
 */
function sendFromA() {
  messageBus.emit({
    from: '组件 A',
    text: 'Hello from A',
  })
}

/**
 * 模拟组件 B:发送消息
 */
function sendFromB() {
  messageBus.emit({
    from: '组件 B',
    text: 'Hi from B',
  })
}

/**
 * 模拟组件 C:接收消息
 */
const messages = ref<Message[]>([])

messageBus.on((event) => {
  messages.value.push(event)
})
</script>

<template>
  <div class="container">
    <h1>useEventBus(全局事件总线)</h1>

    <div class="card">
      <h2>组件 A</h2>
      <button @click="sendFromA">发送消息</button>
    </div>

    <div class="card">
      <h2>组件 B</h2>
      <button @click="sendFromB">发送消息</button>
    </div>

    <div class="card">
      <h2>组件 C(消息接收方)</h2>
      <ul>
        <li v-for="(item, index) in messages" :key="index">
          {{ item.from }}:{{ item.text }}
        </li>
      </ul>
    </div>

    <div class="card result">
      <h2>说明</h2>
      <p>组件 A 和 B 通过 useEventBus 发送消息。</p>
      <p>组件 C 订阅事件后,可以收到所有广播的数据。</p>
      <p>三者之间完全解耦,没有任何父子关系依赖。</p>
    </div>
  </div>
</template>

<style scoped>
.container {
  padding: 24px;
  font-family: Arial, Helvetica, sans-serif;
}

.card {
  border: 1px solid #dcdcdc;
  border-radius: 6px;
  padding: 16px;
  margin-bottom: 16px;
}

button {
  margin-right: 6px;
  padding: 6px 12px;
  border: none;
  border-radius: 4px;
  background-color: #409eff;
  color: #ffffff;
  cursor: pointer;
}

button:hover {
  opacity: 0.9;
}

.result {
  background-color: #f8f8f8;
}
</style>useCounter(计数器模型)
useCounter 是一个开箱即用的计数器 Hook, 帮你封装了「加 / 减 / 设值 / 重置」这些最常见的操作。
一句话定位:
useCounter = 标准化的计数器状态模型
完整可运行示例(App.vue)
<script setup lang="ts">
import { useCounter } from '@vueuse/core'

/**
 * 初始化一个计数器
 * 默认值为 0
 * 可以传入初始值:useCounter(10)
 */
const {
  count,
  inc,
  dec,
  set,
  reset,
} = useCounter(0, {
  min: 0,
  max: 10,
})
</script>

<template>
  <div class="container">
    <h1>useCounter(计数器模型)</h1>

    <div class="card">
      <p>当前值:{{ count }}</p>

      <button @click="dec()">-1</button>
      <button @click="inc()">+1</button>
      <button @click="set(5)">设为 5</button>
      <button @click="reset()">重置</button>
    </div>

    <div class="card result">
      <h2>说明</h2>
      <p>这是一个带最小值 0、最大值 10 的计数器。</p>
      <p>超过范围时,值会被自动限制在区间内。</p>
      <p>适用于数量选择、页码控制、步进器等场景。</p>
    </div>
  </div>
</template>

<style scoped>
.container {
  padding: 24px;
  font-family: Arial, Helvetica, sans-serif;
}

.card {
  border: 1px solid #dcdcdc;
  border-radius: 6px;
  padding: 16px;
  margin-bottom: 16px;
}

button {
  margin-right: 6px;
  padding: 6px 12px;
  border: none;
  border-radius: 4px;
  background-color: #409eff;
  color: #ffffff;
  cursor: pointer;
}

button:hover {
  opacity: 0.9;
}

.result {
  background-color: #f8f8f8;
}
</style>useCycleList(循环切换值)
useCycleList 用来在一组固定值中循环切换当前值, 非常适合做主题切换、状态切换、模式轮询等功能。
一句话定位:
useCycleList = 在一个数组里不断 next / prev 循环切换
完整可运行示例(App.vue)
<script setup lang="ts">
import { useCycleList } from '@vueuse/core'

/**
 * 定义一个循环列表
 * 可以是字符串、数字、对象等任意类型
 */
const {
  state,
  next,
  prev,
  index,
} = useCycleList(['春天', '夏天', '秋天', '冬天'])
</script>

<template>
  <div class="container">
    <h1>useCycleList(循环切换值)</h1>

    <div class="card">
      <p>当前索引:{{ index }}</p>
      <p>当前值:{{ state }}</p>

      <button @click="prev()">上一个</button>
      <button @click="next()">下一个</button>
    </div>

    <div class="card result">
      <h2>说明</h2>
      <p>点击“下一个”会在数组末尾自动回到开头。</p>
      <p>点击“上一个”会在数组开头自动回到末尾。</p>
      <p>整个过程是一个无限循环。</p>
    </div>
  </div>
</template>

<style scoped>
.container {
  padding: 24px;
  font-family: Arial, Helvetica, sans-serif;
}

.card {
  border: 1px solid #dcdcdc;
  border-radius: 6px;
  padding: 16px;
  margin-bottom: 16px;
}

button {
  margin-right: 6px;
  padding: 6px 12px;
  border: none;
  border-radius: 4px;
  background-color: #409eff;
  color: #ffffff;
  cursor: pointer;
}

button:hover {
  opacity: 0.9;
}

.result {
  background-color: #f8f8f8;
}
</style>useWebWorkerFn(Worker 多线程)
useWebWorkerFn 用来把一个计算密集型函数放入 Web Worker, 在后台线程运行而不会阻塞主线程,返回结果是 Promise 异步响应。
一句话定位:
useWebWorkerFn = 前端计算密集任务“搬到后台线程”轻松处理
完整可运行示例(App.vue)
<script setup lang="ts">
import { ref } from 'vue'
import { useWebWorkerFn } from '@vueuse/core'

// 定义一个计算密集型函数(例如大数组求和)
function heavySum(n: number) {
  let sum = 0
  for (let i = 0; i < n; i++) {
    sum += i
  }
  return sum
}

// 将函数包装为 Web Worker 版本
const { workerFn } = useWebWorkerFn(heavySum)

const input = ref(100000000)
const result = ref<number | null>(null)
const loading = ref(false)

async function handleCompute() {
  loading.value = true
  result.value = await workerFn(input.value)
  loading.value = false
}
</script>

<template>
  <div class="container">
    <h1>useWebWorkerFn(Worker 多线程)</h1>

    <div class="card">
      <label>输入数字:</label>
      <input type="number" v-model.number="input" />

      <button @click="handleCompute" :disabled="loading">
        {{ loading ? '计算中...' : '开始计算' }}
      </button>

      <p v-if="result !== null">计算结果:{{ result }}</p>
    </div>

    <div class="card result">
      <h2>说明</h2>
      <p>heavySum 函数在 Web Worker 中执行,不阻塞主线程。</p>
      <p>即使计算大量数据,页面依然可以响应用户操作。</p>
    </div>
  </div>
</template>

<style scoped>
.container {
  padding: 24px;
  font-family: Arial, Helvetica, sans-serif;
}

.card {
  border: 1px solid #dcdcdc;
  border-radius: 6px;
  padding: 16px;
  margin-bottom: 16px;
}

input {
  width: 100%;
  padding: 6px 8px;
  margin: 8px 0;
  border-radius: 4px;
  border: 1px solid #dcdcdc;
}

button {
  margin-right: 6px;
  padding: 6px 12px;
  border: none;
  border-radius: 4px;
  background-color: #409eff;
  color: #ffffff;
  cursor: pointer;
}

button:disabled {
  background-color: #a0cfff;
  cursor: not-allowed;
}

.result {
  background-color: #f8f8f8;
}
</style>